The first time I roasted pumpkin seeds, I burned the crap out of them.
It was heart-breaking, especially since I wasn’t convinced it was even worth the effort in the first place. All that seed cleaning and pumpkin de-stringing – I didn’t even get to enjoy the fruits of my labour. Hrmph.
Here is the part that no one told me about: The inner seeds cook much faster than the outer shell. I kept peeking in the oven and everything looked fine on the outside. Little did I know, the inner seeds were burnt to smithereens.
Well, thank goodness I didn’t give up after that first miserable attempt! My life just wouldn’t be complete without roasted pumpkin seeds.
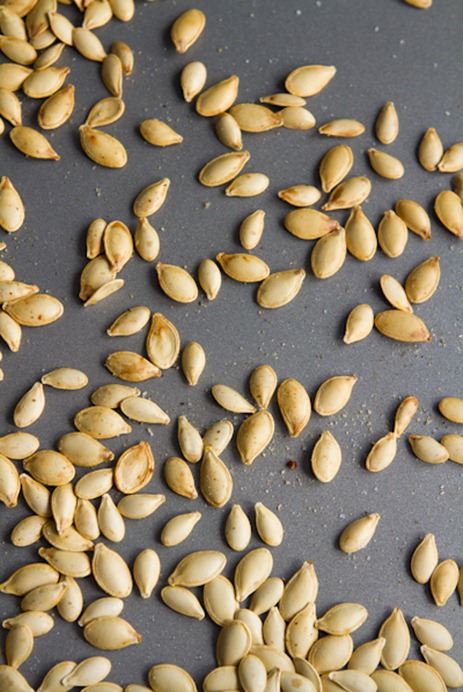
I’m happy to say, the second batch didn’t just work, it blew my mind! The cup of seeds I roasted did not last long between the two of us. Every pass by the kitchen was an excuse to grab a crispy handful off the pan.
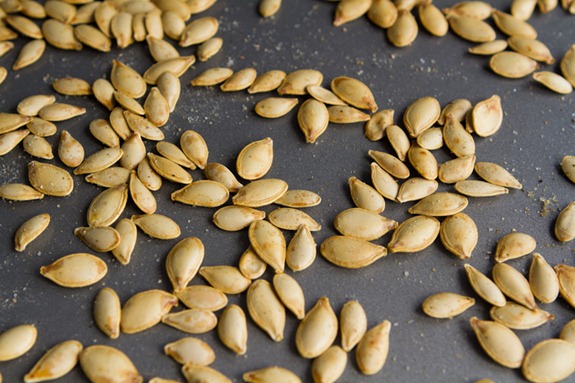
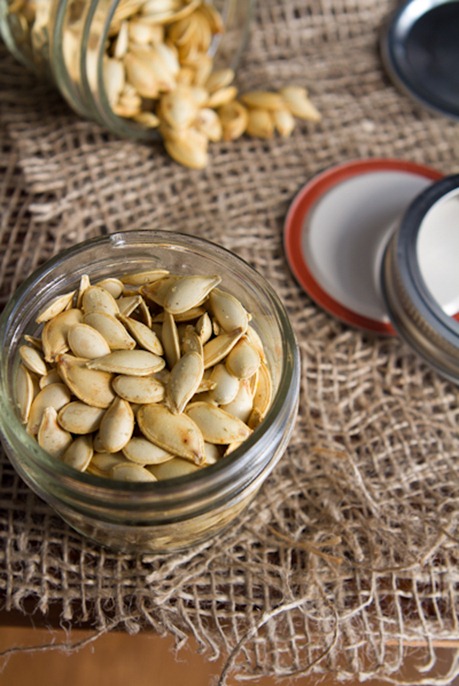
Today, I’m sharing my secrets for a fantastic batch of roasted pumpkin seeds. If you’ve ever doubted they were worth the effort or had so-so results, I beg you to try this one last time. Only I know it won’t be the last time, but the start of a life-long obsession. Watch out pumpkins, we’re coming for ya!
How To Roast Pumpkin Seeds:
1. Clean the seeds. The annoying-but-necessary task is that you have to meticulously clean the seeds until there are no signs of pumpkin guts. The best way to do this (that I have discovered from your comments!) is to plunk the seeds + guts into a big bowl of water and use your hands to break it apart. The seeds will float to the top of the water! They clean much faster this way.
Note: Some of you say that sugar pumpkin seeds yield much crispier seeds than carving pumpkins. I used sugar pumpkin seeds and mine were certainly super crispy!
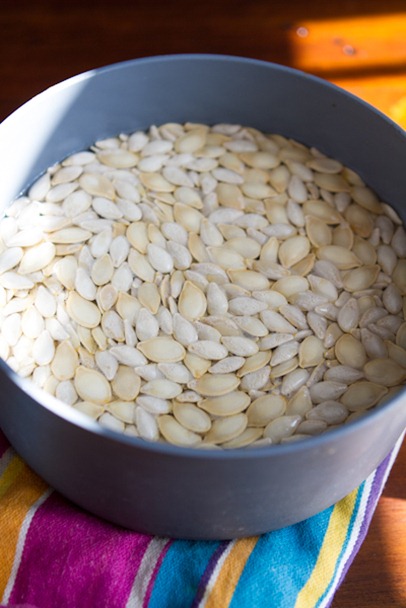
2. Boil for 10 minutes in salt water. Using Elise’s method for inspiration, I added the pumpkin seeds to a medium-sized pot of water along with 1 tsp salt. Bring it to a boil and reduce the heat to simmer, uncovered, for about 10 minutes over low-medium heat. Apparently, this method helps make the pumpkin seeds easier to digest and produces a crispy outer shell during roasting. If you are short on time, you can totally skip this step! They will still turn out lovely.
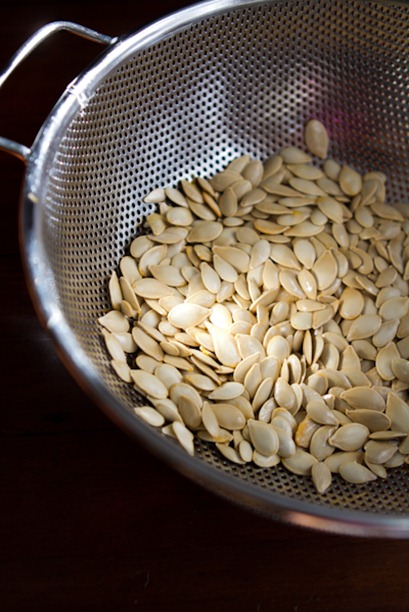
3. Drain the seeds in a colander and dry lightly with a paper towel or tea towel. The seeds will stick to the towel, but just rub them off with your fingers. Don’t worry, they don’t have to be bone dry – just a light pat down.
4. Spread seeds onto a baking sheet and drizzle with extra virgin olive oil (I only needed to use about 1/2-1 tsp). Massage oil into seeds and add a generous sprinkle of Herbamare (or fine grain sea salt will do). Try to spread out the seeds as thin as possible with minor overlapping.
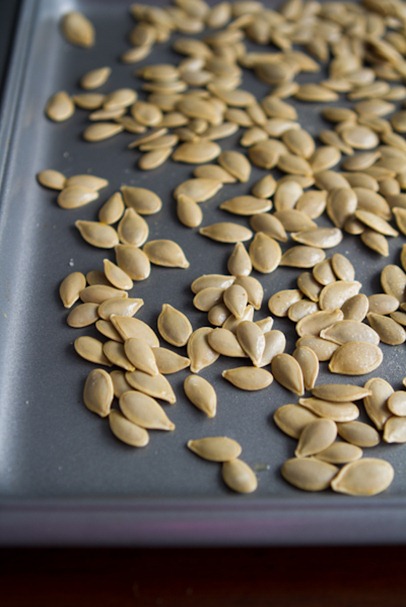
5. Roast seeds at 325°F for 10 minutes. Remove from oven and stir. Roast for another 8-10 minutes (if your oven temp is wonky, this bake time could vary a lot!). During the last 5 minutes of roasting, remove a few seeds and crack open to make sure the inner seeds are not burning (you don’t want the inner seed brown). Cool a couple and pop them into your mouth to test. They are ready when the shell is super crispy and easy to bite through. The inner seed should have only a hint of golden tinge to it. They should not be brown.
6. EAT! Remove from oven, add a bit more Herbamare, and dig in! Ah, so good, so good! There is no need to remove the outer shell; it’s quite possibly the best part.
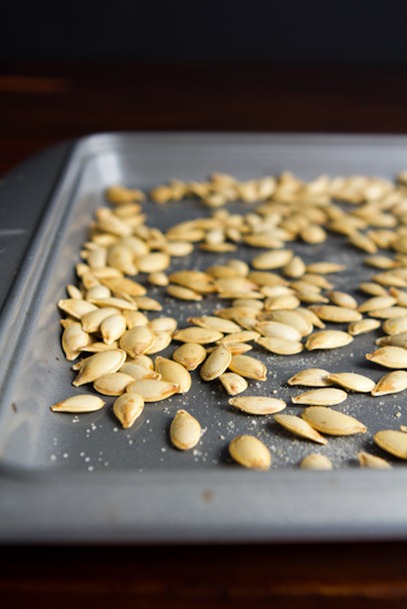
I had no idea I was going to love freshly roasted pumpkin seeds so much. I love how crispy the outer shell is and how fun it is to crunch. They taste a bit like popcorn, but they are much crunchier, filling, and of course packed with nutrition.
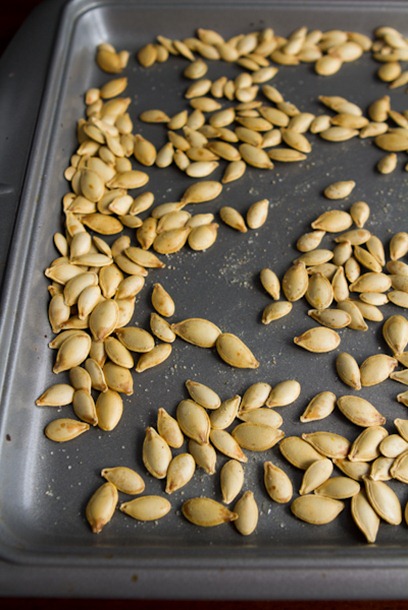
Yes, pumpkin seeds are super healthy for you! They are packed with iron, magnesium, fibre, zinc, potassium, healthy fats, protein, and tryptophan (which can boost your mood and help you sleep). Vegans & vegetarians have been using pumpkin seeds for years as a natural source of iron. I think it’s just about my favourite way to get iron, next to Iron Woman Gingerbread Smoothies, of course. Be sure to pair it with Vitamin C to absorb the most iron you can.
7. Share with some very lucky people! (but chose them wisely…)
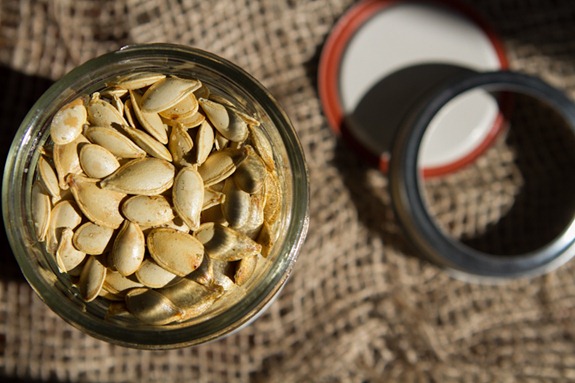
I promise you’ll never throw the seeds out again.
I want to buy pumpkins just to be able to roast another batch of seeds. And of course, make homemade pumpkin puree. I’m already looking forward to making some different flavour combos – maybe garlic powder, cayenne, rosemary, brown sugar or cinnamon, nutmeg, ground cloves, etc would both be nice to try out? I can’t wait to experiment…many ideas are a-swirlin’ in my…stomach.
Looking for more pumpkin recipes?
Creamy Pumpkin Pie Smoothie for Two
All Natural Pumpkin Butter from Scratch (the bomb!!)
Pumpkin Pie Chia Pudding Parfait
and more than 20 more pumpkin recipes!
What spices would YOU put on your roasted pumpkin seeds?
How to Roast Pumpkin and Seeds
Yield
4 cups flesh, 3/4 cup seeds
Prep time
Cook time
Total time
This is my go-to method for roasting a sugar pumpkin and its seeds at the same time! Most recipes tend to provide instructions on roasting them separately, but I wanted to come up with directions on how to roast them both simultaneously. And, luckily, I've discovered it couldn't be easier.
Ingredients
- 1 sugar pumpkin (2 1/2 to 3 pounds)*
- Extra virgin olive oil
- Pink salt, fine sea salt, or Herbamare
Directions
- Preheat the oven to 325°F (160°C) and place two racks near the centre of the oven. Grab two rimmed medium-sized baking sheets and line one of them with parchment paper.
- Fill a medium-sized bowl with water and set aside. Lie an absorbent towel onto the counter next to the bowl.
- Slice off the pumpkin stem and discard.
- Place the pumpkin, cut side down, onto a cutting board. Carefully slice the pumpkin in half.
- Scoop out the pumpkin seeds and flesh/strings and place it all into the bowl of water. The seeds will float to the top (like magic!). Using your hands, grab the big chunks of flesh and pick off any attached seeds. Place the seeds back into the bowl of water. Discard/compost the chunks of flesh.
- Use a slotted spoon to remove the seeds. Let excess water drip off and then place the seeds onto the towel. Blot dry (the seeds don’t have to be bone dry and it’s okay if there are some strands attached—they add flavour!).
- Spread the seeds onto the baking sheet without the parchment and toss with 1 teaspoon of oil. Spread the seeds out into a single layer and sprinkle with salt.
- Mist or spread oil all over the inside of each pumpkin half and then sprinkle with salt and pepper. Place each half cut-side down onto the lined baking sheet.
- Place both sheets into the oven with the seeds on the lower rack. Roast at 325°F (160°C) for 20 minutes then remove the seeds and taste test a couple. As long as the inner seeds aren't tasting burned, you can keep roasting them. I usually return the seeds to the oven for another 3 to 4 minutes. Remove the seeds and cool.
- Leave the pumpkin in the oven and increase the oven temp to 350°F (180°C). Continue roasting the pumpkin for another 12 minutes or so, until fork-tender. (The timing may vary based on how large and fresh your pumpkin is.) At this point you can slice it up and serve it as a side vegetable with your meal, or process/blend the flesh to make homemade pumpkin purée.
Tip:
- * One sugar pumpkin (roughly 2 3/4 pounds) yields about 4 cups (720 g) of roasted pumpkin flesh and 3/4 cup (75 g) seeds.
I make these all winter long! Never heard that about boiling it… will have to try it.
They are also really good roasted with coconut oil, cinnamon, and a bit of cardamom. Or savory with a curry powder!
coconut oil – great idea!
I actually made this with coconut oil – my favorite! Adding garam masala is also nice…
Add a bit of cinnamon even better!
I soak the seeds for a while and the pumpkin gunk separates if you set the water level hughg enough…pumkin seeds float! Straining through paper towel after colander helps too.
I am trying this out now and have found an extremely easy way to separate the seed from the pulp. It was really an accident, I was pondering how to clean them, (carved the pumpkin first), then scooped out with a stainless spoon onto the counter top. While asking myself what would be the easiest method to clean the seed I reached down and grabbed a handful of pulp, VIOLA!!!!!! The seeds squeezed right out of the pulp and what I didn’t catch stuck to my hand. I started just picking up the pulp and squeezing. Amazing results. Now to roast. TX
I wear a pair of gloves to make cleanig seeds easier and keeps my hands from itching. Soaking seeds for about an hour first makes cleaning a snap. I rub seeds against each other. I’ve attempted seeds before and failed. No one would eat them. This receipe is awesome. Thanks!
As a hardcore pumpkin seed junkie I have used this cleaning method for years since my kids were young…They called it “milking the pumpkin”. Use form fitting latex gloves. After I cut the top off the pumpkin I pull out the insides one pulp strand at a time and grab the course part of the pulp with one hand and pull down with the other. The latex gloves let me hold onto the pulp but by working my way down. the pulp with gentle pressure 99% of roastable seeds go into my container with 0 sticking to anything. After I toss the gloves without even having to wash my hands. I rinse the seeds in a colander pick out any large pieces of pulp missed then transfer seeds to my “salad spinner” . While using cold water and “spinning”… the remainder of pulp tends to stick to the sides whiles seeds slide to the bottom making it easier to get “clean” seeds, after that follow your favorite recipe for roasting
Why toss the gloves? Environmentally really bad. They can be washed and reused!
Besides the sunk environmental cost of having manufactured the gloves, transporting them, and selling them, what “environmentally really bad” consequences are you imagining to be associated with placing used latex gloves in the trash?
Ben,
While I don’t know exactly what Susan meant,
I am guessing that latex gloves are not biodegradable and therefore
will sit in the landfill forever….
Your method required to use a silver spoon to scoop out the pumpkin seeds I only own golden spoons. Are you suggesting I go out and purchase some silver spoons. Please respond as soon as possible
This is a very good point since I only own yellow and red spoons and would be very interested to see how the spoon color affects the scooping of the pumpkin seeds.
Not sure if troll.
Whatever you do, DO NOT use a blue spoon. After 250 stitches and a 3 week stay in the hospital, plus several months rehabilitation, I can say that this is a very bad idea.
Thanks Pete! you made laugh!!!
I found this also that the seeds are buoyant and the pumpkin guts are not.
Good observation. Cut the top off the pumpkin. Cut the rest into quarters, put the quarters in a clean sink full of water and the process will be a breeze because the seeds float. Just scrape them out and scoop up the floating seeds in a colander.
will soaking the seeds affect the roasting of the pumpkin seeds. I am an eager at home cooker and am looking for the best way to roast pumpkin seeds.
I like the curry powder idea!
They came out wonderful! Thank you.
I am roasting pumpkin seeds for German Seedy bread- Dreikernebrot- right now!.
Turns out the pumpkin seeds i bought at the store are coming from China and I worry they have heavy metals or something worse-though they look at taste ok.
love this new found dark German seedy breads- also calls for seseme and sunflower seeds, dk rye, and whole wheat flours.
No need to rinse. Pick out what you can and spread out onto sheet or counter and let dry overnight. They taste BETTER if you don’t bother cleaning them up too much. I get most of the stuff off by squeezing them out of the pulp and whatever little bits there are I leave on.
I totally agree. I love little bits to cling to the seeds. Really ups the flavor!
I agree with you! Seems like a real shame to take away the natural flavor ingredients.
I get off by squeezing mine too! It’s a BURST of flavor!
Hey Deb, I’ve been trying out this no rinse method and WOW…really, really delicious. Looks like I’ll have to update this post soon. Thanks for sharing everyone!
Please do update post, or create a new one. I don’t rinse or boil seed with great results but havn’t found a similar method online (except in comment sections).
Totally agree, no rinse and no boil is the way to go. I add nothing but a bit of salt as they dry.
The German bread sounds great! The title literally means three seed bread. :) Can you send me the recipe please?
Lucky for me, I have my own little pumpkin patch growing like crazy in my garden right now! The pumpkins aren’t quite ready for picking, but now I can’t wait until they are! I personally will love adding spicy Herbamare to my seeds, but my husband isn’t a huge salt fan, so I’m thinking I might make him a spicy batch seasoned with cumin and chili powder!
When i was in kindergarden i tried this before and they tasted so good. But since i always visited family to celebrate Halloween i ever acually tried it. But now we stayed home and i finally got to make them.. thanks SO much, this way was faster(:
I haven’t done this since I was a kid!! I’m thinking I need to channel my inner child and get my hands dirty! Oh yeah, I’ll have you know I bought 2 sugar pumpkins yesterday thanks to you and I’m going to roast them and make something yummy! Thanks!!
thanks so much!! helped me a lot!!
One of my favorite things!
Why be so complicated? When I roast my seeds, I leave the pumpkin guts on the seeds, adds a bit of pumpkin flavour to them! I toss them with a bit of soy sauce (or use tamari), and slow roast them in the oven, checking often. They are so yummy!
Really? Interesting – didn’t think that would work! Do they take longer to roast?
I usually leave some guts on as well, and have never boiled them. They take about the same time, as I recall (it’s been a year, so hard to say). I usually roast at 350.
i baked My pumpkin seeds an i put parsley on them they were so good
yep me too. no need to rinse and clean. way more yummy flavour with a bit of guts on there :)
I just tried the method you mentioned above last night – (didn’t boil the seeds in salt and left some guts on). It worked, but I have to say the seeds had less flavour (even when sprinkling on salt) and they didn’t get as crunchy compared to the boiling method. I would definitely recommend giving the boiling method a shot! I’ve also heard you can add spices when boiling and it infuses the seeds. I’ll be trying that next.
Thanks for trying the non-boil, leave some guts on method, Angela! We appreciate you testing and reporting back. I’ll definitely try them YOUR way.
Try drying them out of the oven for a coule of days then roast in oven to get them nice and crunchy. I roast mine at 250 for 2 hrs plus a few minutes at a higher heat to brown off a bit more.j
I have never boiled my pumpkin seeds either. They taste much better with the pumpkin bits baked on and it’s much less work. I’m also concerned that boiling them will drain them of the nutrients they provide.
Dana, how do you know they taste better if you have never boiled the?
She said they taste better with the pumpkin bits left on. Not that they taste better not having been boiled.
read it!
I agree with Natalie. My mother and I used to use the same methowhen I was a kid and I always took them to school. Now that I’m grown and have a newborn daughter, I am keeping this tradition/recipe going. However, rather than school I take them to work and more often hunting with me. It doesn’t matter how big of a bag I take, they never last long enough.
Ok last year I gutted pumpkins first and then spent hours rinsing the guts off. This year I pulled seeds out first. The seeds come right out with a little squeeze and the majority of guts stayed in place. It took all of five minutes to rinse off! Thanks for the boil advise. I make three batches using extra fine popcorn salt, then creole mix and finally garlic powder with Lawrey’s.
I’d like a chipotle lime flavor to my seeds, or maybe something sweet like cinnamon & agave?
chipolte lime sounds great. :)
I will seriously carve an absolutely horrible design into a pumpkin (4 year olds can carve better than me) just to get to the pumpkin seeds. They are like little pieces of delicious healthy crack!
hah I feel ya!
It’s great to know that the best of cooks even burn their seeds ;) My very first recipe on the blog was roasted squash seeds, one of my favorite things about Fall. I still do it every now and again. My favorite seasoning is probably herbamare. Can’t (ever) get enough of the stuff!
Glad to see the Herbamare love – it will make anything taste good.
Easy way to clean the seeds: soak them in water for an hour, then rinse them in a pasta strainer. The holes should be large enough to let the pumpkin out and small enough to keep the seeds in. Massage the seeds while rinsing and pick out the larger clumps of pumpkin, and they will be perfectly clean in less then 5 minutes.
Ah I love it, thanks!! :)
I believe that when you soak them, they float and you can just (mostly) skim them off the top!
A couple others mentioned this too – great idea. I will try this next time :)
I just dumped them into a large mesh strainer and as I rinsed them I rubbed them against the mesh. They were clean in a matter of minutes!
I make a version with rosemary, olive oil, garlic, salt and cayenne- people raved about them at my halloween party last year! I’ll have to try the salt water boil trick this time when I make them!
I only made pumpkin seeds once and followed a recipe I found, only they ended up being way too spicy and since I’m not a fan of spicy they went to waste haha I need to try it again this year :)
I’ve only ever tried roasting pumpkin seeds once and they turned out very meh. So I’ve never done it again and now I need to try your method and try again!
I usually rock a salt or cinnamon flavour but maybe nutritional yeast is in order this year!
Really anxious to put my favourite popcorn topping flavours on pumpkin seeds:
chili powder, cayenne, cane sugar and cocoa powder
OR
lime zest, cane sugar, chili powder, cayenne
Great tutorial, I’d never heard of boiling them first. Thank you!
Those combos sound perfect! LOVE the idea of using nooch too.
I’m having a Halloween party and was having a hard time finding healthy treats for everyone (I have cookies, cupcakes, cakepops, etc). This will help so much! Who doesn’t love roasted pumpkin seeds? The sweet and spicy combinations sound delicious!
I always make many flavors each year…love them. My friend does like 10 pumpkins and brings me the seeds. I always leave a little gunk,as I call it, on the seeds taste yummy after it’s baked. I always make salt and pepper, garlic and salt, buffalo wing sauce(these take longer to roast,but so good), and once I even did tomatoes(small cherry tomatoes cut in half) with basil and olive oil. They are all so good. And I use the same method for chick peas that I roast when I have no seeds.
Thank you for posting this!! I never really know what I’m doing when I roast pumpkin seeds, and just kind of hope for the best. I didn’t know that the inner seed cooks faster than the outer shell- good to know! I really hate cleaning the seeds… but the end result is so worth it. I’m going to throw some tamari on the first batch I roast this season. :)
I am trying to remember the specifics, but I experimented roasting so many different kinds of winter squash seeds last year. Some were awful – the “thicker” ones, but I can’t remember which were good and which were bad… I think kabocha was a bust.
You are right, Lauren. The type of squash can make a big difference. Probably the age and maturity as well. I have had great results from sugar pumpkins, calabaza, and delicata. Carving pumpkins came out ok. Butternut pretty tough.
Thanks, Angela, for the great tutorial. Thanks to all the contributors for the great suggestions.
I can’t take the credit but my husband last year made a sweet batch with a little brown sugar and cinnamon. And a spicy with garlic, salt and cayenne. They were delicious! Also we weren’t too thorough on cleaning for the sweet batch and I agree with someone else who said this, but the pumpkin goo that was left on helped to make it sweet! They were still crunchy too!
Thanks for this! Last time I had homemade pumpkin seeds, I was in second grade, after a field trip to the pumpkin patch, and they were super chewy and hard to swallow (literally!). I haven’t had a taste for them since, but I’m definitely going to try this when I get my pumpkin for Halloween! Do you know if seeds from sugar pumpkins and carving pumpkins differ in how they’re roasted?
That’s a great question – I was wondering the same. Maybe someone else knows?
Not quite the same but it’s a subtle difference. The carving pumpkin seeds are a bit “chewier” so they don’t have quite the crunch as sugar pumpkin seeds. At least the ones I’ve tried. :)
That’s really good to know! Mine were super crunchy…yum
a little vinegar in the cleaning water and most the pumpkin will fall off
I could eat handfuls of pumpkin seeds. I have never done it this way. I want to see if there is a significant difference to my lazy but simple way! I just rinse, pat, and bake. I have a feeling your version is going to taste better though. ;) I will let you know! Thanks for the post Ang!
One thing I love is dividing the seeds and make a sweet version and a savory version!
Enjoy! Ps Love your new pic :)
I used ur recipe and they turned out amazing. It was my first time making them And I didn’t burn any Thank you so much
if you put the seeds in a big bowl of water then swish them around with your hands and let them sit for a while, most of the pumpkin falls to the bottom and the seeds come up to the top! almost completely clean by then.
I roasted the pumpkin seeds I had last fall but I must have done something incorrectly. Do you eat the outside shell also? I guess I didn’t realize there was an outside and inside shell. I tried eating the outside shell and I couldn’t chew them. They were tough and stuck in my throat. I ended up throwing them all away.
Someone commented saying the sugar pumpkins yield crispier seeds. Was it a carving one?
I’m not sure what it was. I thought it was pie, but maybe not.
Just have your kid do the cleaning so u do not need to
CARDAMOM!!!! Every thing is better with cardamom and cinnamon…
I always forget about it but yes so good!