

Lately, I’ve been doing everything in my power to use up my garden vegetables.
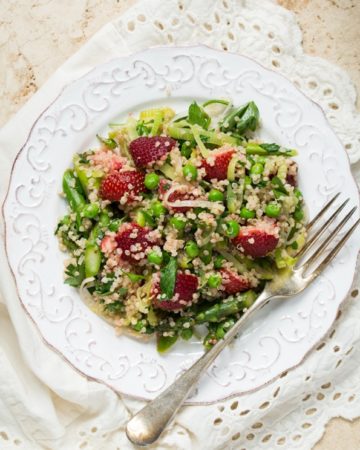
Over the past week I’ve been enjoying Roasted Tomato Basil Pesto, Long Weekend Grilled Salad, Kale Chips, cucumbers and hummus, Weekend Glow Kale Salad, and Chocolate Chip Cookies. To balance out the vegetables of course.
This end of season bounty reminds me of the organic Plan B CSA that we had last summer. There is so much produce to use up!

I even started gathering “bouquets” of kale and giving it away to friends and neighbors as I beam with pride, “I brought this for you!”
“Oh, you shouldn’t have….really you shouldn’t have.”
I think I might be starting to lose friends.
We’ve been getting a lot of wet and humid weather lately and I realized if I leave the peppers on the plant too long the inside starts to grow mold. Never a good thing to discover when you slice one open!
I knew that I had to use up these beautiful peppers…or bust.

And because I seem to be obsessed with roasting and grilling things lately, I decided to roast my peppers. Roasting is a great way to “condense” a large amount of vegetables. Kale chips, I’m looking at you!
How To Roast Peppers
Ever roasted peppers before? I used to be scared to try because I thought it was really difficult. You want me to PEEL the skin off? How in the world…?
Turns out, it’s so easy Sketchie could do it! Although, he does have really long claws…

1. Start by preheating the broil setting on your oven (I used heat setting 4 out of a possible range of 5) and move the rack up to the top or second highest spot. Line a large baking sheet with tinfoil.
2. With a paring knife, carefully slice a circle around the top of the pepper. You can use any type of pepper you prefer! I used bell peppers and banana peppers, as that’s what I grew in my garden.
Discard the inner flesh and seeds as best as you can.

3. With the cut side down, slice down the middle of the pepper, creating two halves.

Like so. Remove rest of seeds.

4. With your hand, SQUASH each piece! Whee!

I’m sorry for this picture, I really am. I’m a one woman show, clearly.
Squashed!

5. Place all the flattened pieces onto your baking sheet. I roasted about 6 small peppers, but if using large ones, you could probably use 3?

P.S.- This baking sheet should be lined with tin foil not parchment– I changed this after I took the photo.
6. Broil for about 10-13 minutes, until blackened. My peppers were in there about 12-13 minutes at broil setting 4.

7. This is where your tin foil comes in handy! Carefully wrap up the peppers with the tin foil and let it steam for about 15-20 minutes. Meanwhile, you can prepare your hummus ingredients.

8. After 15-20 mins, gently peel off the blackened skin. This is why it’s important to really blacken your peppers; the more black the skin gets the easier it is to peel away. It really does come off easy.

Your discard pile on the left and your delicious roasted peppers on the right:

Now it’s time to make delicious, creamy roasted red pepper hummus. It’s just what you do!


Featuring all new, protein-packed salads, hearty toppers, flavour boosters, and dressings you'll want to drink, my new cookbook will transform the way you think about salads. Oh, and be sure to flip to the back for a surprise dessert chapter!

Ultra Creamy Roasted Red Pepper Hummus

Yield
2 cups
Prep time
Cook time
0 minutes
Total time
This is one of the creamiest hummus recipes that has ever come out of my processor! It has a light sweetness with a lovely roasted flavour thanks to the roasted red peppers.
Ingredients
- 1 garlic clove
- One 14-ounce/400ml can chickpeas (about 1 1/2 cups cooked)
- 3/4 cup roasted red peppers
- 1/4 cup tahini
- 5 tablespoons freshly squeezed lemon juice, or to taste
- 2 tablespoons reserved chickpea brine (or water)
- 1 teaspoon fine sea salt, or to taste
- 1/8 to 1/4 teaspoon cayenne pepper, to taste
- Extra virgin olive oil, for drizzling
- Smoked paprika, for garnish
Directions
- Open the can of chickpeas and spoon off 2 tablespoons of the brine (liquid). Reserve this for the recipe. Now, drain the rest of the can and rinse the chickpeas well.
- Add the garlic clove into a food processor and process until finely chopped.
- Add the drained chickpeas, roasted red peppers, tahini, lemon juice, and reserved chickpea brine into the food processor. Process until the hummus is silky smooth. Scrape down as necessary.
- Now add in salt and cayenne, to taste, and process again until combined.
- Scoop into a bowl and drizzle with olive oil and garnish with paprika. This hummus will last about 4-5 days in the fridge in a sealed container.

Thanks to the delicious roasted peppers, this is the creamiest and silkiest hummus to come out of my processor!

I couldn’t get over how smooth it became once I put the roasted peppers in. It was as if I added a half cup of oil, only I didn’t. Yeehaw.

This counts as lunch, right?


Yum! This sounds lovely!
that looks delicious! I keep wanted to make my own hummus – i just need to go for it!
I’ve totally been on a hummus kick lately, mmm goes with my lunch, snacks,& dinner :)
Haha I love the picture with you squashing the red pepper, gotta do what ya gotta do!! Your peppers grew to be pretty neat shaped! Can’t wait to grow some peppers in my garden next year. (Tip: Don’t get “pepper” plants from your Grandpa who has a 10’x4′ table covered with baby vegetable plants. You just might end up with far too many green beans, and NO peppers.) :)
lol ;) Good time for sure…
I LOVE roasted red pepper hummus. It’s one of my favorites from the store so I make quite a bit of it at home for myself :) Need to make more!
I’m just going to go send this to my sisters so they can continue with their new hobby of yelling at me for making them hungry…
P.s. You can bring me bouquets of kale. You should totally bring me bouquets of kale. Pretty please?
I’d love to be your kale fairy!
That looks so delish! So sad summer is over and I wish we planted more peppers. Sigh, there always next year :D
I’m having my bridal shower this weekend so I’ll hopefully be getting our food processor and this will be one of the first things I make! Of course, after I bake those cookies from yesterday!
amazing as usual Angela (I adore this blog)!, I want to share a secret for hummus, I always use roasted garlic for any kind of hummus I make (I keep extra roasted garlic in olive oil in the fridge for easy access :) ).. transforms the dish and eliminates the side “effect” :)
wow great idea!
We have a surplus of bell peppers, too, and we’re almost out of hummus. Roasted red pepper hummus was the first kind I ever tried to make, and it turned me into a hummus lover. I love that you put lemon juice in your recipe, so I will have to try it out!
Oh, that looks delicious. By the way, I would die with happiness if anyone ever brought me their surplus kale!
I just made your hummus that changed everything yesterday…..I would dip my foot in it and eat it!! I did add 4 extra cloves of garlic! My hubby won’t come near me :) I will have to make this recipe next week!!! And I would take your kale too!!!! YUM!!!!
Glad you enjoyed it! LOL @ dip your foot in it…hilarious.
Holy Cow!! This hummus with these peppers are killing me over here!! Nothing beats roasted red pepper hummus on a nice cracker or piece of toasted bread! HELLO Friday Night Dinner!!
xxoo
I love roasted red pepper humus! So delicious! My fave variety for sure!!
Thanks for the tutorial. Looks so much easier than roasting them whole while sticking your hand in the oven to turn. I can’t wait to try the hummus!
I grew up on middle eastern food, but am slightly intimidated to try making it–I think I might start with some hummus! :-)
You take the most beautiful pictures, and I love the step by step instructions. It makes it seem easy enough that even I could do it!
Thanks for the tasty posts! I have recently become Vegan and have found your blog to be heaven sent!!!!
Thank you!
Angela, this looks SO good! Roasted red pepper hummus is my favorite :) I’m just curious, what kind/size food processor do you use? I’m looking for one to make recipes such as this. Thanks!
I have a 14 cup kitchenaid…I got a big one for my bakery :) but it’s not necessary to have one that big.
I am definitely going to tackle this recipe :D thanks for posting and thanks for teaching me how to roast red peppers :D