

Halloween week without chocolate is simply a crime. We must fill our quota! Luckily, I have the perfect solution..
After teasing you with this dessert the other week (and seeing you lose your mind over it) I figured I better deliver the goods. I set a lofty goal of making this chocolate pie as friendly to as many different dietary needs as I could. I always love a good challenge in the kitchen; it keeps me on the brink of crazy town.
In addition to being vegan, this pie is also gluten-free, grain-free, and nut-free. A Halloween miracle if you ask me!
It’s also free of self-control because it’s impossible to have any when this pie is near. Obviously.

Halloween chocolate quota fulfilled. Check, check, GULP.

After drowning myself in chocolate, I’m absolutely thrilled with the final result. Plus, now I have a freezer full of chocolate pie for a couple parties we’re hosting this week. [Eric said, “Well that’s if I don’t eat it all first!”]
And of course, let’s not forget HALLOWEEN. Adriana is going as a carrot to balance out the chocolate. I know…she’s going to hate me. But come on, a newborn carrot bunting costume? JUST STOP.
Tip: I had major trouble with the pie crust sticking to the dish in an early trial. Eric saved the day with his genius solution. It involves three strips of parchment paper placed on the base of the dish, and then you cover it with a piece of plastic wrap on top. This way you can pull out the entire pie using the parchment paper. It still takes some wiggling to pop it out, but this worked so much better than my other attempt. Thanks Eric for letting me sleep at night. Note: The pictures below don’t show the parchment strips because it was an earlier trial.
Ok enough chit chat. I’d say there’s still time to whip up a crazy decadent, show-stealing, rich chocolate pie. And it’s no-bake to boot. Thirty minutes of prep and a few hours in the freezer is all that stands in your way. Nothing scary about that!
PS- Don’t mind the long recipe – I learned a lot of tips as I made this pie so I wanted to be as helpful as I could when writing up the recipe.


Featuring all new, protein-packed salads, hearty toppers, flavour boosters, and dressings you'll want to drink, my new cookbook will transform the way you think about salads. Oh, and be sure to flip to the back for a surprise dessert chapter!

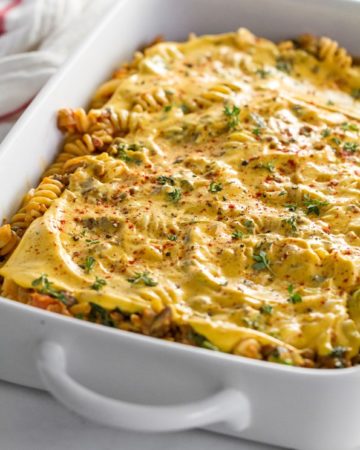
Double Dark Chocolate Coconut Macaroon Tart

Yield
9-12 servings
Prep time
Cook time
Chill time
3 hours
Total time
Calling all chocolate macaroon lovers! That's everyone, right? This tart combines two of my favourite flavours - dark chocolate and coconut. The velvety filling is made up of 70% dark chocolate and rich coconut milk while the coconut, date, and cocoa crust tastes just like a chocolate macaroon. Be sure to read the entire recipe before you begin to pick up my helpful hints.
Ingredients
For the crust:
- 1 1/4 cups packed pitted Medjool dates (see note)
- 1 1/4 cups unsweetened shredded coconut
- 2 1/2 tablespoons ground flax seed
- 2 1/2 tablespoons unsweetened cocoa powder
- 1 tablespoon coconut oil
- 1/4 teaspoon fine grain sea salt, or to taste
- 1 teaspoon water (if needed to bind the dough)
For the filling:
- 3 (70%) good-quality dark chocolate bars (300 grams total)
- 1 (400ml) can full-fat coconut milk, room temperature
- 4 tablespoons pure maple syrup (or liquid sweetener of choice)
- 1 teaspoon pure vanilla extract
- small pinch fine grain sea salt
Coconut whipped cream (optional):
- 1 (400ml) can full-fat coconut milk, chilled overnight
- 1 tablespoon pure maple syrup (or liquid sweetener of choice)
For the garnish:
- 1/2 cup toasted large flake coconut, flaked sea salt, leftover coconut whipped cream (optional)
Directions
- Toast the coconut (optional step, but recommended): Preheat oven to 325°F. Place shredded coconut and large flake coconut (if using for garnish) on baking sheet. Keep separate on baking sheet. Toast in the oven for 5-10 minutes, until lightly golden but not brown. Set aside to cool.
- Line a 9-inch glass pie dish with 3 (2-inch wide) strips of parchment paper, one going each direction, with overhang. Now place a large piece of plastic wrap on top and press down (see this photo for a visual). The parchment strips will allow you to lift the pie out after freezing. I highly recommend doing this or the crust will stick miserably to the dish.
- Prepare the crust: In a heavy duty food processor, add the pitted dates and process until finely chopped. A big ball will form. Add in the rest of the crust ingredients (including the toasted shredded coconut - but not the large flake coconut) and process until everything is combined. The dough should stick together when pressed between your fingers. If it doesn’t, add optional water and process again.
- Spoon the crust mixture into the prepared pie dish. Spread out evenly. Starting at the centre, press down firmly moving outward and up the sides of the pie dish. Place dish in the freezer while you prepare the filling.
- Prepare the filling: Break up chocolate bars into chunks and place into a medium-sized pot. Melt the chocolate over the lowest heat setting (or use double boiler). When the chocolate is 2/3 of the way melted, remove from heat and stir until completely melted and smooth.
- Shake the can of room temperature coconut milk. Open it and measure out 1/4 cup of milk. Save the 1/4 cup of milk for another use (such as a smoothie) and pour the rest into the pot with the melted chocolate. Whisk vigorously until completely smooth. Finally, whisk in the maple syrup, vanilla, and a pinch of salt until smooth. Set aside.
- For the whipped cream (optional): Open the can of chilled coconut milk and scoop off the cream portion only. Discard the water or save for a smoothie. Place the cream into a bowl along with one tablespoon of pure maple syrup. With electric beaters, whip the cream until smooth.
- With a spatula, scoop the chocolate filling into the pie crust until almost full (to avoid overfilling, you might want to refrain from using all the filling- see my note below).
- Drop a few tablespoons of whipped cream all over the chocolate filling and swirl it all around with a knife. Carefully transfer the pie dish into the freezer on a level surface for approx. 3 hours, or until firm throughout.
- Remove pie dish from freezer and let sit on the counter for 5-10 minutes. Grab the parchment paper and lift the pie out of the dish (I had to grab the strips of paper and wiggle it back and forth several times before it popped out).
- Slice and garnish with toasted coconut flakes, leftover coconut cream, and flaked sea salt, if desired. Serve immediately as pie will soften quickly.
Tip:
- If your dates are firm, soak dates in a bowl of water for 30 minutes prior to starting. Drain well.
- You can totally skip the coconut whipped cream if you prefer.
- The chocolate filling makes almost too much filling for the pie and it nearly overflows. If you prefer, you can leave out 1/4-1/2 cup of filling. You can place leftover filling in a small dish and freeze it, then cut into "freezer fudge" - just an idea!
- For how to make coconut whipped cream, see this tutorial.
Nutrition Information
(click to expand)
PS – Looking for other Halloween recipes? You’re in luck – I have 3 pages of recipes
PPS – Don’t forget there is still time to enter The Oh She Glows Tea Shoppe giveaway!


I made this today for dinner guests tonight. Amazing! It was so easy to make and absolutely decadent. I love your recipes because they always turn out right.
I tried that recipe, and shared it with non-vegetarian people, and it was unanimous, every slice of that tart is a piece of wonder!
So easy to prepare, and to make it look beautiful as yours.
Thanks a lot :)
PS : had the same effect with the perfect veggie burgers and with the chilled dark chocolate pie with toasted almond crust and strawberry vanilla compote !
Im so happy everyone loved it!! Thanks for reporting back :)
Hi Angela, I made this bad boy yesterday and it is amazingly delicious! My partner said it was as good as something you’d order in a restaurant. One question though, can you tell me how long it will last in the freezer or how it should be stored to keep? I don’t want to eat it all crazy fast (well I do, but my health doesn’t want me to!).
thanks!
Amy
hi Amy! so happy you enjoyed it! I froze mine – I sliced it first, placed pie slices individually on a plate and froze until solid, then i wrapped each piece in tin foil and popped into glass container and into freezer. worked fine!
Dreamy and indulgent. I love chocolate with coconut.
I made this dessert yesterday for our weekly family dinner. I topped it with coconut whipped cream and fresh raspberries. It got rave reviews! My daughter said she wanted it for dessert every week! One thing I did differently was I used a spring-form pan instead of a pie plate. I used parchment paper on the bottom and used some coconut oil to grease the sides. It worked perfectly! Thank you so much for the recipe!
I’m wondering if something like Dutch Processed Baking Coca could be used instead of the chocolate bars. I can’t eat soy, and bars often have soy lecithin in them. Or perhaps Enjoy Life brand chocolate chips, as they are soy free?
I made this and my husband and I LOVE it! Easy recipe and the result is rich, dark, and decadent. This is definitely a keeper.
I made this last week for my Mom’s birthday! It was a big hit! Luckily there was enough leftover to last for 2 days! So Good!!!
Hi Angela, this tart is absolutely divine. Used 90% chocolate though, and used a springform pan lined with parchment paper and greased the paper and sides with some coconut oil, worked out great. Just remembered, the pumpkin oatmeal anytime squares were a huge hit.
Can this be made ahead of time? I want to serve this on Thanksgiving Day but won’t have time that day to prepare it. Thanks!! Lori
This looks amazing! If I make this ahead of time for Thanksgiving, do I let it freeze longer, or take it out after three hours and store it in the fridge?
either is fine :) Whichever you prefer!
Is this something you can make the night before? If so, would I just leave in the freezer overnight and take out 15 minutes before serving?
Thanks!
yes you certainly can make in advance…you can also leave it in the fridge too.
Fabulous. It is going to be a delicious Thanksgiving!
Hi,
About to make this dish for thanksgiving. How do I got about making the desert ahead of time and storing it? Just freezer it and then place in fridge a few hours before serving?
Thanks and cannot wait to try it!
I won’t make this again. I couldn’t taste the coconut and my coconut whip cream was hard to swirl so I had to basically mix it in so it didn’t look pretty at all
Hello – this is my first comment on your blog! I made your kale salad, sweet potato casserole and this pie as part of our Thanksgiving dinner. They were all great – but this one wins! It’s like a glorious vegan ganche in a pie crust. Next time I make a cake, I’m going to try chilling it and whipping it for frosting like I used to do with regular dairy ganache. I was introduced to your recipes after your book came out, which led me to the blog. Everything I’ve made has been easy and delicious – I make at least one thing (usually more!) off the blog or out of the book each week. Thanks for all the yummy and healthy food. My husband and 2 1/2 year old daughter love it all, too!
Hi Sara, Thank you for the feedback! So happy you are enjoying so many recipes. :)
Wow! This looks amazing. I’m having some guests over in a couple of weeks. I will definitely be making this recipe!!
So excited to make this! Thank you for posting. One question: Are the flax seeds a must? I am sensitive to flax. Is it possible to omit them or sub with something else?
Made this for thanksgiving with a few changes, added almonds to crust and used 2 bars of chocolate for the filling instead of three. Let it chill in the fridge overnight and served with coconut cream on the side, it was perfect!
Hello,
I am on a budget and I am wondering what is the best/healthiest type of sugar to use in baking? I looked at the price of coconut sugar and with the amount of baking I do it is too costly.
Wow, is this tart ever amazing. Life-changing amazing. I made it without the extra coconut whipped and it was still incredibly rich and delicious. This is going to be my holiday family get-together go-to dessert – I’m going to make the next batch in a 9X9 pan and cut it into bite-sized squares. Haha, probably a double batch with the second pie, ahem, forgotten in my fridge…
ps. I preferred the texture of the filling better when it has been in the fridge rather than the freezer. It held together quite well and didn’t melt when at room temp