

I’m baaaaaaack and I missed you!
I’m currently suffering from Empty Nest Syndrome since my family left yesterday. Luckily, the Bachelorette and some leftover wine consoled me last night.
Saturday night, I threw a ‘Build your own pizza party’ with my family. Initially, I was worried that the pizza wouldn’t turn out and everyone would be disappointed, but my worries vanished as soon I saw the beautiful pizzas come out of the oven and the kids faces light up!

If you followed my Project Food Blog journey last year, you may know that I used to be terrified to make my own pizza dough crust from scratch. Actually, any type of bread baking involving yeast terrified me for years! I stuck to buying pre-made crusts at the grocery store. It was only when I was faced with Project Food Blog’s Pizza Challenge, that I had to face my pizza dough fears and dive right in.

That night, I tried out 5-6 pizza dough recipes right there in my kitchen with a bottle of wine. It was fabulous. I created all kinds of flavours like herb and cheeze, chocolate, and cinnamon sugar. Most of them tasted horrible, but I was learning!

After 10 trials of pizza dough, I finally conquered my pizza dough fear and I discovered that sometimes you just have to get flour in your keyboard, dough stuck in your hair, and polish off a bottle of wine until you find your groove. it’s a life mantra, really.
After talking with my family this weekend, I discovered that so many of us have this same fear about making pizza dough from scratch. Today, I’m going to show you step by step how to make the pizza dough of your dreams!
I’ll wait here for a second while you get your apron on and pour yourself some wine.
Ready?

Let’s begin.
How To Make Homemade Whole Wheat Pizza Dough
Recipe –> For my whole wheat pizza dough recipe, I used this ‘Amazing Whole Wheat Pizza Crust’ by Marla on Allrecipes.com. It is rated 4.5/5 stars by 578 users! It’s my fav!
Step 1) Proof your Yeast
In a large bowl, dissolve 1 teaspoon of white sugar in 1 and 1/2 cups warm water (about 45C/110F). Stir until dissolved. Now sprinkle 1 tablespoon dry active yeast on top of the sugar-water mixture and let stand until foamy, for 8-10 minutes.
It will look like this after 10 minutes (if it doesn’t foam, your yeast is inactive!)

Step 2) Mix in olive oil and flour
Add 1 tablespoon olive oil into the yeast mixture and gently stir. Now, mix in 2 cups of whole wheat flour and 1 cup of all-purpose flour and stir until the dough starts to come together.

The dough will be very cracked and scruffy looking at this point and this is totally NORMAL! Do not fear!!

Step 3) Flour the surface
Add the remaining 1/2 cup of all-purpose flour onto the counter and place dough on top.

Tip: At this point, soak your bowl in soap and warm water for easy rinsing later!

Step 4) Knead the dough
Now it’s time to knead the dough (for a great video tutorial, see here) until all of the flour has been absorbed and the ball of dough becomes very smooth and non-tacky. This is the point when you will feel like you did something horribly wrong because your dough looks like crap! But, trust me, it will eventually come together in 8-10 minutes of kneading!!! It really does take the full 8-10 minutes until it comes together. Shape into a ball. Once you make a few pizza doughs, you will know exactly when it’s ready.

And yes, kneading dough by hand is a workout, but we’ve never been afraid of a little work, right?
I tried a few pizza doughs with my KitchenAid stand mixer dough hook last Fall and they never came out as good as kneading by hand. There’s a reason why pizzerias still knead dough by hand!

5) Admire your beautiful ball of dough that you worked so hard on!
Your dough will look like this after 8-10 minutes of kneading:

6) Oil the Bowl
Rinse bowl and lightly oil it. Place dough ball in the bowl and lightly move it around to coat the ball with oil. This will prevent it from sticking to the bowl as it rises.

7) Let the dough rise
Place dough in the bowl and cover with a towel. Let it rise until it’s doubled in size, about 1 hour. In the summer, I just leave the dough on the counter, but if it’s cold, you might want to place it in the oven (NOT turned on) with the light on to keep it warm.

After rising, punch out the air.

8.) Second Rise
Divide dough into two balls (for 2 thin crusts) and place both on a floured surface. Allow the 2 balls to rise, uncovered, for 45 minutes.
I made a double batch of this dough recipe, so I had 4 balls at this stage!

9) Preheat oven and Shape the dough
Preheat the oven to 425-450F. (If using a pizza stone, preheat the pizza stone for 1 hour at 450-500 F and sprinkle on cornmeal onto your pizza peel) Punch out any remaining air in the dough and then begin shaping with your hands. I like to toss it in small circles over and over to get it going. It takes a few minutes to get the dough pliable and ready to spread onto the pizza pan or stone.


You can place your dough onto an oiled pizza pan or onto a Pizza Peel sprinkled with cornmeal if using a Pizza Stone.
Spread out the dough with your fingers until your desired shape is achieved.

Gently pinch the crust with your fingers.

I like to spread on garlic infused olive oil onto the crust to give it flavour.

10) Add your sauce and toppings!

Add your tomato, pesto, or BBQ sauce..and then sprinkle on your toppings! I used Daiya cheese on my section and most of the adults tried it and commented on how good this vegan cheese is. It’s a great non-dairy alternative!
The kids loved building their own pizzas!! So cute :)

11) Bake until golden and cooked through
If using a pre-heated Pizza Stone, use your pizza peel to gently slide the pizza onto the stone in the oven. I highly prefer pizza stones because they give the pizza a very authentic crispy crust!!
Last Fall, I tested three popular pizza baking methods:
1) Pizza pan –> Soft crust, soft interior
2) Back of a baking sheet –> Soft crust, soft interior
3) Pizza Stone –> Authentic, crunchy crust, with soft interior
The pizza stone won by a landslide!

However, on Saturday night, we used pans to save time since we had 3 large and 4 mini pizzas to cook! It was just enough dough for everyone (I made a double batch).

After baking for about 15 minutes, pizza perfection was achieved.

Nothing to be scared of, trust me!
Now, go on and try your hand at your own homemade pizza crust. I’m confident you can rock it!!

Pizza from scratch is always a crowd pleaser no matter who you are entertaining.

Pizza fear conquered.

Now who wants to come over for a pizza party?

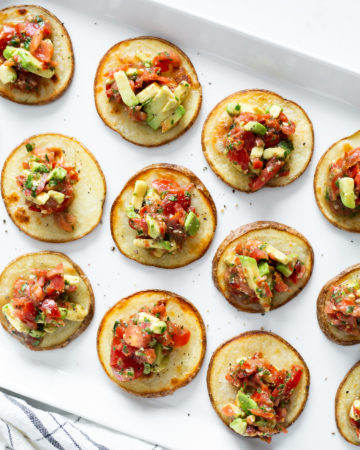
We can have Fruit Pizza with Avocado Lime whip for dessert. ;)


They look delicious. I have been making pizza dough for a few years but definitely have not perfected it. Good to hear about the dough hook as that is usually what I use – will try kneading by hand. I usually make 4-6 pizzas as we all like different kinds, often have friends join us and love leftovers for lunch! This is an every friday night thing so I really need to perfect this.
One of the problems is I really do not want to use white flour. I use ww or spelt – and maybe need to add more gluten (have not done that in awhile). Thanks for the inspiration – I am excited to get on this project again!
BTW – I used to use pans to speed up the process but the stones are so much better – I now have 3 stones in at a time and just keep rotating. Works great :-)
This is a wonderful tutorial, Ang! I love making homemade pizza but am usually lazy and buy the dough at Whole Foods. I will try your recipe :)
Ahhhh finally I can give up mahhh lazy ways! Love you Ang <3
Pizza night is always a hit in our household! I agree with the hand kneading, it by far produces a superior product, plus you get in a good arm workout :) I swear by Martha’s dough recipe and in our house, the thinner the crust the better.
now if only I could make a GF version that is that warm and fluffy! and of course, the wine pairing is the best part, right?
;)
YES! Now I have no excuse not to make pizza. I really can’t stand what I call the “fake” pizza crust that is nothing like pizzeria crust. This is perfect, thank you!
SO nice to have you back- us readers missed you, TOO :)
I’ve never made homemade pizza dough before, and honestly, it’s all centered around fear. You make it look so easy! Definitely bookmarking this tutorial!
Um, those look amazing. I have to say that I love making yeast products. My mom makes homemade bread so I was never intimidated by the process. I relish my time baking bread as I find the kneading and process incredibly therapeutic and relaxing. I wish I liked Daiya (sigh) but I do love full roasted veggie pizzas. Amazing! Thanks for the tutorial.
Your crust seriously looks perrrrfect!! I always make mine long and rectangular because I can’t get that nice circle shape. :) Great tutorial post!! I’ll take the fruit pizza please!
Looks delicious! My spouse and I were just discussing maing home-made pizza this week. We’ve been looking for a new dough recipe…we’ll try this one! Thanks!
Us Chicago folk love our pizza! Great post and directions!
That dough looks incredibly perfect! I actually came to the realization the other day that I prefer homemade pizza to any other kind (frozen, delivered, eat-in) and the dough has everything to do with it!
You make it look so easy and less intimidating but I’m still SCARED! :D
it’s ok to be scared but you can still do it! ;)
Yummy! I’ve always been afraid of yeast too >.< I actually still am, even though I bought a tbsp of active dry yeast in a bulk store.
I love how in this recipe, you don't have to wait 12 hrs or a whole day or something just to let the yeast rise but only around 2 hrs. I am bookmarking this!!
Great post! I like the step by step pictures! The dough looks amazing!
i’ll be there tonight. with wine!=)
Hi Angela!
I’ve been reading your blog for a couple months now and am really inspired! I am a huge bread baker but always avoided making my own pizza dough until I used the recipe in Peter Reinhart’s book (The Bread Baker’s Apprentice). It’s fabulously easy to make in the stand mixer and vegan, too. I have had great results using a regular oven set to 500F. Anyway, if you’re timid about making yeasted stuff (including delicious cinnamon rolls…), I’d recommend his books. It also may be of some help to try using instant yeast–there’s no proofing involved and it makes this faster and more reliable, too!
Looking forward to reading more from you!
Lauren
Love! This looks awesome.
Did you really use only vegan cheese??
The melted result looks soooo yummy. I have tried using Daiya cheese and I find that it has a weird after taste to it…
Did you use the brand Daiya, in the pizza you made on Saturday night as well (as pictured above) ?
If yes, just looking at the picture… I must give it another try :p
Thank you for sharing :)
The image at the bottom is with the regular cheese. Daiya doesnt melt as much as reg cheese does, but it comes close enough that I dont mind.
That pizza’s looks divine! I never thought of proofing the yeast first. Guessing it activates the yeast faster right? Drool worthy :)