

I’m baaaaaaack and I missed you!
I’m currently suffering from Empty Nest Syndrome since my family left yesterday. Luckily, the Bachelorette and some leftover wine consoled me last night.
Saturday night, I threw a ‘Build your own pizza party’ with my family. Initially, I was worried that the pizza wouldn’t turn out and everyone would be disappointed, but my worries vanished as soon I saw the beautiful pizzas come out of the oven and the kids faces light up!

If you followed my Project Food Blog journey last year, you may know that I used to be terrified to make my own pizza dough crust from scratch. Actually, any type of bread baking involving yeast terrified me for years! I stuck to buying pre-made crusts at the grocery store. It was only when I was faced with Project Food Blog’s Pizza Challenge, that I had to face my pizza dough fears and dive right in.

That night, I tried out 5-6 pizza dough recipes right there in my kitchen with a bottle of wine. It was fabulous. I created all kinds of flavours like herb and cheeze, chocolate, and cinnamon sugar. Most of them tasted horrible, but I was learning!

After 10 trials of pizza dough, I finally conquered my pizza dough fear and I discovered that sometimes you just have to get flour in your keyboard, dough stuck in your hair, and polish off a bottle of wine until you find your groove. it’s a life mantra, really.
After talking with my family this weekend, I discovered that so many of us have this same fear about making pizza dough from scratch. Today, I’m going to show you step by step how to make the pizza dough of your dreams!
I’ll wait here for a second while you get your apron on and pour yourself some wine.
Ready?

Let’s begin.
How To Make Homemade Whole Wheat Pizza Dough
Recipe –> For my whole wheat pizza dough recipe, I used this ‘Amazing Whole Wheat Pizza Crust’ by Marla on Allrecipes.com. It is rated 4.5/5 stars by 578 users! It’s my fav!
Step 1) Proof your Yeast
In a large bowl, dissolve 1 teaspoon of white sugar in 1 and 1/2 cups warm water (about 45C/110F). Stir until dissolved. Now sprinkle 1 tablespoon dry active yeast on top of the sugar-water mixture and let stand until foamy, for 8-10 minutes.
It will look like this after 10 minutes (if it doesn’t foam, your yeast is inactive!)

Step 2) Mix in olive oil and flour
Add 1 tablespoon olive oil into the yeast mixture and gently stir. Now, mix in 2 cups of whole wheat flour and 1 cup of all-purpose flour and stir until the dough starts to come together.

The dough will be very cracked and scruffy looking at this point and this is totally NORMAL! Do not fear!!

Step 3) Flour the surface
Add the remaining 1/2 cup of all-purpose flour onto the counter and place dough on top.

Tip: At this point, soak your bowl in soap and warm water for easy rinsing later!

Step 4) Knead the dough
Now it’s time to knead the dough (for a great video tutorial, see here) until all of the flour has been absorbed and the ball of dough becomes very smooth and non-tacky. This is the point when you will feel like you did something horribly wrong because your dough looks like crap! But, trust me, it will eventually come together in 8-10 minutes of kneading!!! It really does take the full 8-10 minutes until it comes together. Shape into a ball. Once you make a few pizza doughs, you will know exactly when it’s ready.

And yes, kneading dough by hand is a workout, but we’ve never been afraid of a little work, right?
I tried a few pizza doughs with my KitchenAid stand mixer dough hook last Fall and they never came out as good as kneading by hand. There’s a reason why pizzerias still knead dough by hand!

5) Admire your beautiful ball of dough that you worked so hard on!
Your dough will look like this after 8-10 minutes of kneading:

6) Oil the Bowl
Rinse bowl and lightly oil it. Place dough ball in the bowl and lightly move it around to coat the ball with oil. This will prevent it from sticking to the bowl as it rises.

7) Let the dough rise
Place dough in the bowl and cover with a towel. Let it rise until it’s doubled in size, about 1 hour. In the summer, I just leave the dough on the counter, but if it’s cold, you might want to place it in the oven (NOT turned on) with the light on to keep it warm.

After rising, punch out the air.

8.) Second Rise
Divide dough into two balls (for 2 thin crusts) and place both on a floured surface. Allow the 2 balls to rise, uncovered, for 45 minutes.
I made a double batch of this dough recipe, so I had 4 balls at this stage!

9) Preheat oven and Shape the dough
Preheat the oven to 425-450F. (If using a pizza stone, preheat the pizza stone for 1 hour at 450-500 F and sprinkle on cornmeal onto your pizza peel) Punch out any remaining air in the dough and then begin shaping with your hands. I like to toss it in small circles over and over to get it going. It takes a few minutes to get the dough pliable and ready to spread onto the pizza pan or stone.


You can place your dough onto an oiled pizza pan or onto a Pizza Peel sprinkled with cornmeal if using a Pizza Stone.
Spread out the dough with your fingers until your desired shape is achieved.

Gently pinch the crust with your fingers.

I like to spread on garlic infused olive oil onto the crust to give it flavour.

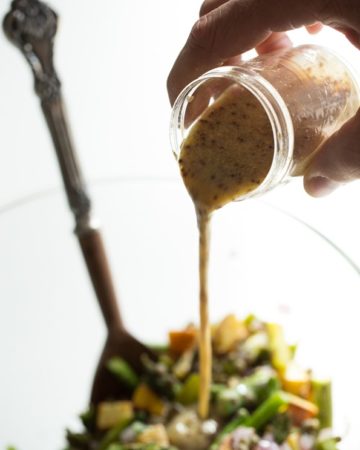
10) Add your sauce and toppings!

Add your tomato, pesto, or BBQ sauce..and then sprinkle on your toppings! I used Daiya cheese on my section and most of the adults tried it and commented on how good this vegan cheese is. It’s a great non-dairy alternative!
The kids loved building their own pizzas!! So cute :)

11) Bake until golden and cooked through
If using a pre-heated Pizza Stone, use your pizza peel to gently slide the pizza onto the stone in the oven. I highly prefer pizza stones because they give the pizza a very authentic crispy crust!!
Last Fall, I tested three popular pizza baking methods:
1) Pizza pan –> Soft crust, soft interior
2) Back of a baking sheet –> Soft crust, soft interior
3) Pizza Stone –> Authentic, crunchy crust, with soft interior
The pizza stone won by a landslide!

However, on Saturday night, we used pans to save time since we had 3 large and 4 mini pizzas to cook! It was just enough dough for everyone (I made a double batch).

After baking for about 15 minutes, pizza perfection was achieved.

Nothing to be scared of, trust me!
Now, go on and try your hand at your own homemade pizza crust. I’m confident you can rock it!!

Pizza from scratch is always a crowd pleaser no matter who you are entertaining.

Pizza fear conquered.

Now who wants to come over for a pizza party?

We can have Fruit Pizza with Avocado Lime whip for dessert. ;)


Ha! you look just like me with your laptop in the kitchen. And even more like me with wine by the laptop.
We should be friends.
We’d be in good company! heh
Me too, wine on the counter while making the dough. By the way, your pizza dough is the best and easy to make, my kids love it.
can it be frozen
Mmmm, looks so delicious! I LOVE making my own pizza, my mom taught me how to do it when I was in high school and I’ve been making it ever since! There’s something especially rewarding about eating a pizza that you made yourself.
gosh angela this looks so beautiful! glad you enjoyed all the time with your family…..welcome back :)
Thanks! :)
Great “how to”! Making your own dough seems so overwhelming, but once you get it down there’s no sub for fresh dough! :)
Homemade dough makes for the BEST pizza! My dad worked in a pizzeria when he was in college so he makes the best, authentic dough….there really is nothing better! I can’t wait to try your method out!
Your pizza dough recipe is one of my all-time favorites. I don’t normally make my own pizza dough but when I do I always go for your recipe. It’s so easy and has never failed me! :-P
Me please!! This looks delicious Ange! I remember all of your dough trials for PFB and it looks like you’re a pro now! :) Sounds like you had a great time with your family and I’m sure they were all very well fed. I’m totally craving pizza now, and it’s only 10am!
If only I could find a great gluten free mix to work with! I’ve been searching but the ones I have tried do not do pizza any justice. If anyone has found a good mix I’d love to know (comment below!). This looks so great Angela, homemade pizza brings back tons of fond childhood memories for me.
I think this recipe will be exactly what your looking for! Enjoy!!! :) minimalistbaker.com/the-best-gluten-free-pizza-crust-sauce/
I’ve never ever made home made pizza dough but now its on my must make list! But first i will have to figure out where the pizza stone is i haven’t unpacked yet :)
That last picture of the dessert pizza took my breath away :D
Aw, I’m sure that pizza party will be one your family (especially the kiddos) remember forever :)
thanks for the AWESOME step-by-step instructions and beautiful photos, angela! i bet you were “auntie of the year” with the pizza party!
so glad you had such a good time with your family. as a devoted auntie myself, i can appreciate how you’re feeling today – hugs!
Gorgeous pizzas and great tutorial! I love this pizza crust too and have made it with all whole wheat flour successfully. :)
THIS IS AWESOME! I’m a huge fan of make-your-own-pizza with friends and family, but I’ve never been successful with my dough-making attempts so I’ve always just bought Trader Joe’s. Thanks for this! will have to test it out with a bottle of pinot grigio sometime :-P. love your blog btw!
Thanks Kate :)
You make it look so easy and beautiful!
This is such a great post–I love it! Will definitely trying it. :) (With the bottle of wine, of course–can’t leave that step out!)
Yummm, looks like such a fun pizza party! Love make your own pizza’s, so good and such a great way to entertain and customize the menu :)
Do you think it is possible to freeze pizza dough?
Yes you absolutely can! I havent done it yet, but I have heard from many people who do.
I got this from Chowhound forum:
‘If you do two rises, do it b/w the first and second rise. If you do one rise, do it after you make it. Shape it into a disk, zap it with little oil, saran wrap it and then put it into a ziplock. Deep freeze is better than your regular freezer b/c it can be frozen longer and won’t tend to form as much ice on it. When you thaw it, take it out the night before and put it (still wrapped) into the fridge. A few hours before use, unwrap and oil it, put it in a big bowl and cover it as you would to proof. Use when it has risen. I am sure they say 3 months storage, but I have gone 6 months without ill effect. Also, you can oil up the dough portions, stuff them in a ziplock and store in the fridge for up to five days. Warm as I said above. You can make flat bread with them.’
http://chowhound.chow.com/topics/337965
I, too, was scared to make my own pizza dough, but it finally came time to conquer those fears and I’m so glad I did because it was the best crust I’d ever tasted!
Welcome back! The guest posts were great, but there’s nothing like the real thing! Your pizza party looks like it was a lot of fun. We have mini pizzas every Sunday, but the crusts we buy are so expensive, I would love to make a big batch of your dough and freeze it for our pizzas. Can I do that? What would be the proper storage method and how long do you think it would last? Thank you for your help!!
See my reply to kerry below! :)
I have been buying premade crust or I’ve been making a homemade crust that is just ok — kind of like if you make pizza english muffins — it tastes ok but it is not the real deal. THIS looks like the real deal! And I am so asking for a pizza stone for my birthday :)