

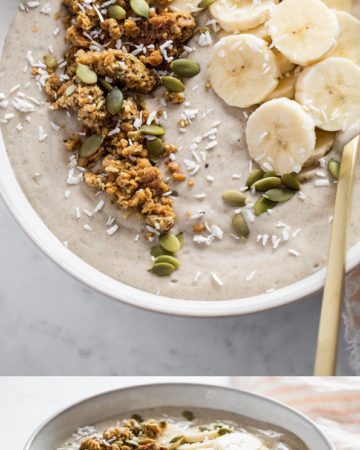
When I mentioned that I was working on a homemade milk post many of you asked for a low-cost and nut-free homemade milk recipe. I decided to put myself to the challenge. Homemade Oat Milk, it is!
First, I’ll show you how I made it with step-by-step photos and at the end of my post I’ll share my thoughts on flavour, price, texture, and overall pros and cons.

You will also need a blender (any blender should work as we don’t need to blend the oats super smooth), a fine sieve, a large bowl, a small bowl, and measuring spoons/cup. I haven’t tried this oat milk with cheesecloth or a nut milk bag yet, but if anyone does please leave a comment and let us know how it goes.


Featuring all new, protein-packed salads, hearty toppers, flavour boosters, and dressings you'll want to drink, my new cookbook will transform the way you think about salads. Oh, and be sure to flip to the back for a surprise dessert chapter!
Homemade Oat Milk

Yield
3 cups
Prep time
Cook time
0 minutes
Total time
Ingredients
- 1 cup steel-cut oats
- 3 cups filtered water
- 1.5-2 tbsp pure maple syrup (or other liquid sweetener or pitted dates), to taste
- 1 tsp pure vanilla extract
- scant 1/4 tsp fine grain sea salt (enhances flavour)
- 1/4 tsp ground cinnamon (optional, but nice)
Directions
- Rinse and drain 1 cup of steel-cut oats. [I’ve heard you can also use oat groats.} Place oats into a bowl and cover with water. Soak for around 20 minutes. You can soak longer (even overnight) if desired.
- After soaking, rinse and drain the oats very well. This step is very important because you want to rinse off any of the oat slime that has occurred from soaking. Yes, oat slime is a thing...it happens.
- Scoop oats into your blender and add 3 cups water. I prefer using 3 cups of water as opposed to 4 cups because it yields a creamier/thicker milk. Feel free to add more water if you wish, just know the more water you add the thinner your milk will be.
- Cover with lid and turn the blender on a low speed, increasing the speed gradually, and blend at the highest speed for about 8-10 seconds only. You don’t need to completely pulverize the oats.
- Place a fine sieve over a large bowl and pour the oat milk very slowly into the sieve. You might have to do this in a couple batches depending on the size of your sieve.
- With a spoon, gently push down on the oat pulp so the milk flows through. This helps push the milk into the bowl, leaving the oat pulp behind in the sieve.
- Scoop the oat pulp into a small bowl and set aside. Clean out your blender and sieve with a good rinse of water until no pulp residue remains.
- Place sieve over top of your blender and pour the milk in once again and strain.
- Rinse out the bowl and sieve once again. Strain the milk through the sieve into the bowl (optional). If you don’t want to strain again, simply add in your mix-ins and blend on low.
- I whisked in 1.5 tbsp maple syrup, 1 tsp vanilla, 1/4 tsp fine grain sea salt (enhances sweetness), and 1/4 tsp cinnamon. These mix-ins turn your oat milk from bland to hmm-this-could-be-decent-when-cold.
- I strained my milk one last time into a clean blender. Then I poured the milk from the blender into a clean mason jar for storage in the fridge.
Tip:
Notes: This should last in the fridge in a sealed container/jar for 4-5 days. Use it in smoothies, oatmeal, cereal, baking, or drink it straight. If you want to use it in a savoury recipe, you can omit the sweetener, vanilla, and cinnamon. Homemade milk does separate (remember there are no added emulsifiers!), so be sure to give your milk a very good shake (or stir) before using. No biggie. A little non-dairy milkshake never hurt anyone. I just don’t want you to be alarmed when you see the heavier ingredients sitting at the bottom of the jar.
This should last in the fridge in a sealed container/jar for 4-5 days. Use it in smoothies, oatmeal, cereal, baking, or drink it straight. If you want to use it in a savoury recipe, you can omit the sweetener, vanilla, and cinnamon.
Don’t let all the step-by-step photos fool you into thinking this is lengthy to make – it takes just 5 minutes once your oats are soaked.
Step 4:


Step 5:


Step 6:


Step 8:


As you can see in the bottom left photo, straining twice gets even more pulp out yielding a smoother milk. I usually strain it 3 times or so, but it’s not necessary if you are time-crunched.
Step 9:


Step 10:


Step 11: I strained my milk one last time into a clean blender. Then I poured the milk from the blender into a clean mason jar for storage in the fridge.


Taste Report:
The flavour of this oat milk is much like I expected; it tastes like oats. Shocking, I know. The biggest challenge I had when testing this recipe was getting it creamy enough. I tried 1/2 cups steel-cut oats with 4 cups water and then 3/4 cups steel-cut oats with 3 cups water. I found both end results to be too watery. Using 1 cup of steel-cut oats to 3 cups of water was my favourite ratio (so far). If you play around with the recipe, I’d love to hear your versions too.
Keeping in mind that this homemade milk is free of emulsifiers and thickeners, I was fairly impressed with the texture. Is it just like store-bought milk? Of course not, but I do think it’s a decent option with a clean ingredient list. It’s much easier on the wallet too!
PROS:
- Very low cost (a batch using steel-cut oats cost me about 50 cents – or less if you can get a deal on oats)
- Nut-free so good for those with allergies
- Quick to make
- You don’t need a nut milk bag or cheesecloth
- Clean up was easy, even with all the spilling I seem to do…
- Decent, but not mind-blowing, flavour
CONS:
- Not as creamy compared to homemade almond milk
- Slightly watery (although this is improved when using 3 cups water instead of 4)
All in all, I feel that the pros outweigh the cons with this homemade oat milk. It’s so cheap to make and that is a huge plus for me. I personally don’t drink much milk by the glass so I think this will be just fine when added to cereal, smoothies, oatmeal, etc. But so far, I’ve been sipping the jar straight from the fridge, letting out satisfied mmm’s and dribbling milk down the front of my shirt. Eric, as always, is quite confident he married a weirdo.
Update: I tried the milk with some Nature’s Path cereal and it tasted a bit like cinnamon toast crunch, probably thanks to the cinnamon in the milk. yummy!
I also made a trial using cooked steel-cut oats and the milk turned out super slimy. I didn’t rinse the oats after cooking, but maybe I should have? I’m going to stick with the non-cooked method.
Odds are that some of you won’t like this milk at all, but it’s also likely that some of you will really enjoy it and appreciate this as a cheap, at-home alternative to the store-bought stuff. I’m quite anxious to see what you think and I welcome your feedback in the comments!

What can you do with the leftover oat pulp? I suggest saving it and mixing it into oatmeal and smoothies. If you have a dehydrator, I assume you could also dehydrate the pulp and then pulverize it in a blender to make flour. If anyone has any other ideas, leave ‘em below.

Have you ever made homemade oat milk or tried a store-bought version? Do you make your own milks at home? If so, what’s your favourite recipe?
Catching up in this series? See: Vegan How To: Introduction (Why this series?), Part 1: How To Make The Transition, Part 2: Replacing Dairy


hi. love the post. do you know what the nutritional value of this would be? (proteins, carbs, fat and calories).
also would love to see a post on hemp milk. I buy the store bought stuff (pacific i find has the best flavor and consistency. we go through alot of it as it is the milk my daughter drinks. it has the best ratio of fat, protein and carbohydrates.
i have tried to make it on my own but need to add xanthum gum to get it not be chunky. (since my daughter is use to pacific brand she won’t drink it chunky.) i assume if i filter it i will lose alot of the nutritional value.
is there a emulsifier that is considered “healthy”?
thanks,
Wow interesting!
I am addicted to almond milk but will definitely consider this option.
I had a question on the filtered water, I use spring water. Does that make a difference?
Im sure both are fine…I mean you can use tap water too, but it would just have all the extra stuff in it and probably not as good tasting.
If I try this, I will try adding the leftover oat pulp to a yeast bread. I LOVE oatmeal bread!
Would this recipe work if I used rolled oats? Maybe if I blended them first? I haven’t been able to find steel cut oats in any of our local grocery stores or health stores.
I tried it with rolled oats and it worked, although was maybe a bit more watery than the steel cut (but honestly it was barely noticeable) Let me know how it goes if you try it!
Thank you Angela I will give it a try this week and let you know how I get on :)
I make my own soy milk. I enjoy the flavour of plain soy milk, and it costs about $0.50 per litre. Oat milk sounds interesting and cheap!
Hi Marielle, How do you make your own soy milk? Do you mind sharing with us?
Hi Angela!
I got the recipe from this blog: http://www.artandlemons.com/2012/04/kitchen-craft-homemade-soy-milk-tofu.html
It’s easy and keeps well. My next endeavour is making soy yogurt with all the soymilk I have and finding more recipes to use up the okara (soymilk by-product)! Okara makes a yummy hummus and packs a protein punch!
thanks, I will check it out!
Well I just sampled my oat milk….pretty dang good, Angela! I have a Vitamix and overblended the oats. Anyway turned out to be a great thing! Because I “overblended”, I didn’t have anything that looked like oats left so I used a plastic coffee filter to strain the oat milk. What was left behind was maybe 1/4 cup of the “slimy stuff” I did have to rinse off the filter a few times when straining. I did strain the whole mixture a couple of times until it flowed freely through the coffee filter. So no “slime”in the milk , hardly any waste (still may try drying what’s left). The other great perk for me is, I won’t have to lug as many boxes of milk walking home from the grocery store (no vehicle). This is tooooo gooood!!
Thanks for sharing your tips! I will have to try it this way next time and report back :) enjoy!
Looks yummy and quite creamy! I like the taste of store bought oat milk, so I’ll try this when I need more milk. I’ve seen some recipes for almond milk where the milk is strained, and the remaining pulp is blended and strained a second time, then added to the first batch (more economical and more creamy?). I wonder if this will work with oat milk?
Worked great with a nut milk bag! Thanks for the recipe…I was looking for a cheaper alternative to buying a big bag of raw almonds every week to make almond milk.
I am going to have to try this soon. The idea of having oatmeal with oat milk just works.
just love your site and would like to say I think you are awesome!
I will have to try this one. I have used store bought almond and soy milk for years because I am allergic to milk. The only homemade milk I have made is Sesame Tahini milk. It sounds like this recipe is a lot like it (except for the cinnamon). I used it all during my first pregnancy to get extra vitamins and stay awake – I was a huge coffee drinker before I got pregnant. My cousin gave me the recipe to try.
I did end up making this with the rolled oats. My end result was a bit watery (looks much waterier than your pictures), but that could have something to do with using rolled oats instead of steel-cut. I will try it again with steel-cut oats, as I’m going to pick some up the next time I’m at the store (along with a bigger sieve. I’ve been meaning to get one for awhile and recipes like this mean it is definitely time. :)). It’s still yummy, though! My husband looked at me like I was insane, but that’s nothing new haha. If the steel-cut oats don’t make it creamier, I will just reduce the water a bit.
This is so interesting! I never would have thought of this. i’m a little nervous to try it though.. :)
HUGE fan of making my own milks! I love hemp and cashew as the nuts are soft enough that you don’t need to strain them. Ice cream made from toasted hazelnut milk is amazing and of course plain old almond. I always use a Nut Milk Bag (or what I call My Nut Sack) to strain them as it just makes for a smoother milk.
Meghan I love hazelnuts is there any chance you could send me the receipe for the toasted hazelnut milk icecream it sounds delicious.
I can’t wait to try to make this! I usually use soy milk, but have thought twice about it after reading that even those milks have non-natual ingredients. Sadly, any homemade nutty milk is out since my boyfriend is very allergic to nuts:( Since I don’t really ever drink milk by itself, but mix it into things, this seems like a great thing to try!
Great idea, I tried it and my kids & I love it! I mixed it with macapowder and that also tasted great. I used oat ‘flakes’ (don’t know for sure what it’s called in english). I ate the heated pulp withtahini and a little maple syrup..yum:-)
To strain my home made milks I use a piece of a (clean;-) ) panty hose…works well and way cheaper than a nut bag.
Thank you I will give this a try and will let you know how I get on.
I made oat milk using your recipe a few days ago- it was simple and delicious! I also approached a woman who was looking at non-dairy milk labels in the grocery store yesterday and gave her your website…that was pretty out of character for me; I rarely initiate conversation with strangers, but it is a testimony to how awesome your site is. Thanks!!!
I would think the pulp would be a good basis for a couple of smooth oatmeal cookies too.
My question, and maybe it’s mentioned, and I missed it: 3 cups of water, 1 cups of oats: How much milk did it yield in the end?
I once made almond milk with a similar recipe, and when all was said and done, the cost — in spite of what the website I followed said — would’ve been about 4-5x the cost of buying it at the store.
It made about 2.5-3 cups…hope that helps!