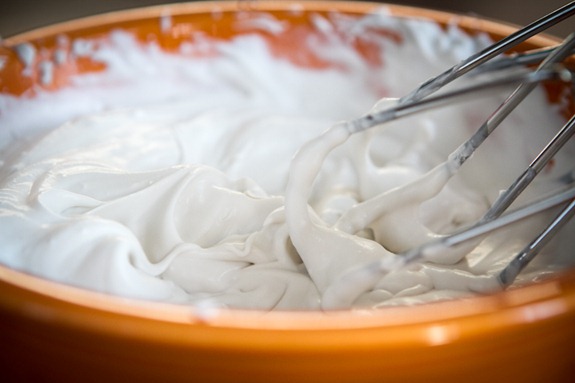
Did you know you can make a decadent whipped cream by using a can of coconut milk? Not only is it simple to make, but it’s easily the best-tasting whipped cream I’ve tried.
I know whipped coconut cream isn’t new to many of you – people have been making coconut whipped cream for years and years. I first read about it a couple years ago on Vegan Joy’s website and have seen it popping up everywhere.
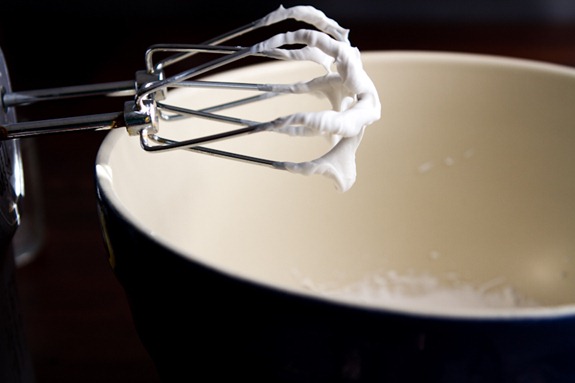
In today’s post, I’ll show you just how easy it is to make. I can promise you, your life will change when you taste this stuff!
1. Grab a can of full-fat can coconut milk (without guar gum listed as an ingredient) – Update: Native Forest now puts guar gum in the ingredients and this causes the cream and water to emulsify which is not what we want. The can must also be full-fat because you will be whipping the solid cream. Do not use light coconut milk because it won’t turn out. In summary – look for a full-fat can of coconut milk that does not have guar gum listed on the ingredient list. Cool?
Many of you have had trouble making whipped coconut cream with certain brands because some cans don’t always separate. A reader let me know that Thai Kitchen has changed their formula so that it doesn’t separate anymore. Apparently they are coming out with small cans of pure coconut cream instead. Be on the look out! I used Native Forest with decent result, although I have had some duds before.
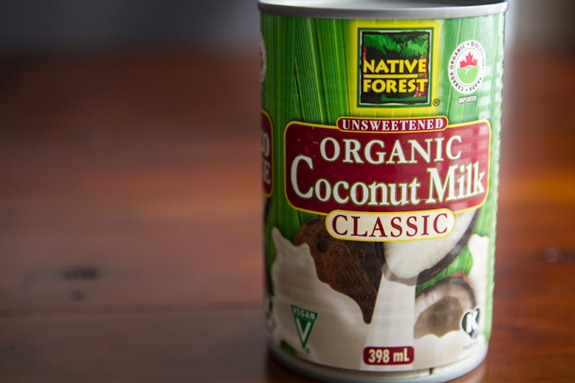
2. Place can in the fridge overnight. This is another crucial step. You need to chill the coconut cream until it’s very firm. I once tried to make whipped coconut cream without chilling the can – big mistake! It was a watery mess. I like to keep at least a couple cans in the back of my fridge just in case I need a quick whipped cream for a recipe. Then you always have it on hand and don’t have to wait overnight to use it. A few extra cans of chilled coconut milk never hurt anyone.
Just before you make your whipped cream, place a mixing bowl in the freezer for 5 minutes or so. This helps keep everything cold and will be especially helpful for those of you in very warm climates. You can also put the beaters in the freezer too, but it’s not necessary.
3. Remove the chilled can from fridge and FLIP it upside down.
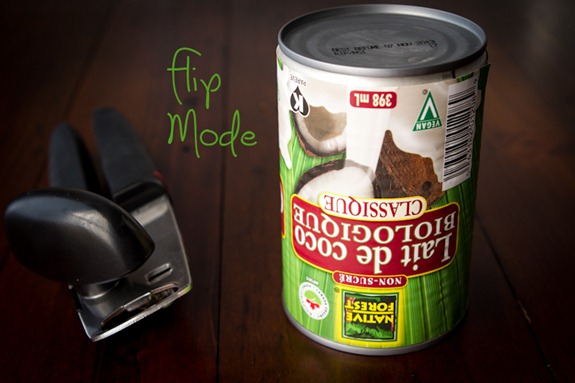
Why flip it upside down?
The liquid coconut milk (the part that doesn’t harden) will now be at the top of the can! Note: Not all cans work for this – check yours.
4. Open the can. See the liquid at the top? You won’t be whipping this part.
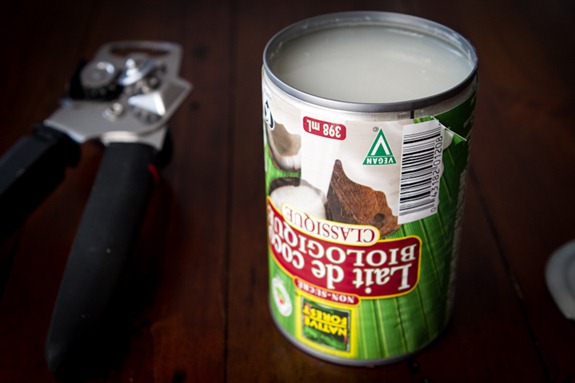
5. Pour the coconut liquid into another bowl. You should have just under 1 cup of liquid, but this yield will vary a bit by brand and even by can.
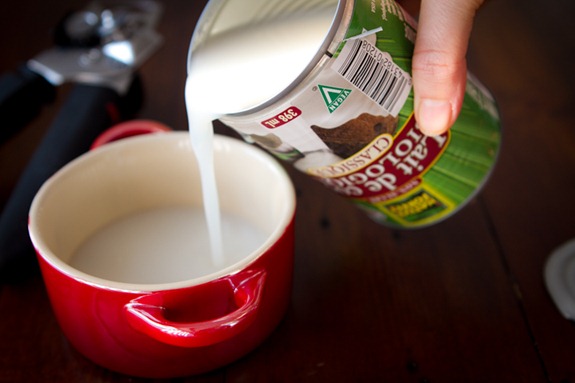
Don’t throw it away – I like to use it in smoothies along with mango, kale, banana, and chia for a fun tropical smoothie. You can also use it in baking and cooking.
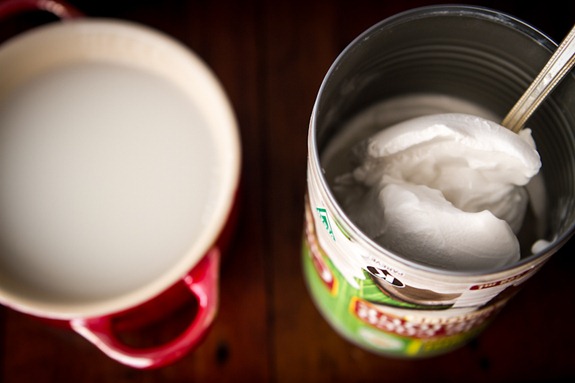
As you can see below, you are left with only the hardened coconut cream! Come to mama!! This is exactly what we want to use to make our coconut whipped cream.
6. Scoop the coconut cream into your chilled bowl. (I don’t recommend using a shallow bowl like this one – I only used it for photo purposes so you could see it better!)
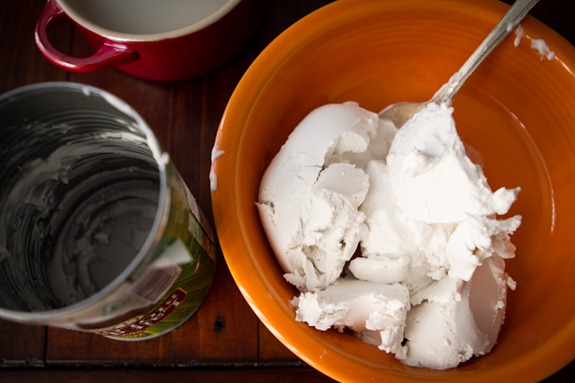
As you can see, you get a lot of hardened cream to work with!
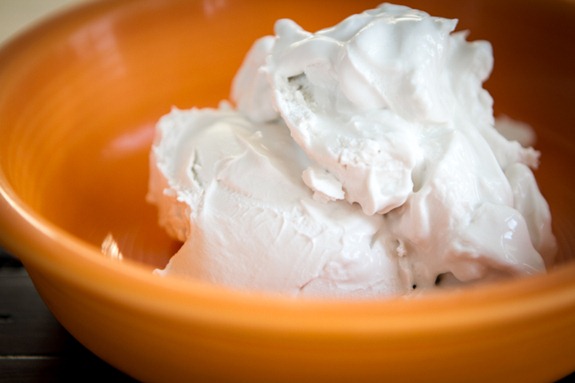
7. Whip the cream. Grab a hand mixer (alternatively, you can do this in a stand mixer – just chill the bowl first) and whip the cream until fluffy. It’s really too much fun.

Coconut Whipped Cream

Yield
1 cup (250 mL)
Prep time
Cook time
0 minutes
Total time
You can easily create a decadent, fluffy whipped cream by using a can of full-fat coconut milk. Not only is the technique simple, but it’s easily the best-tasting whipped cream I’ve tried. You can use this whipped cream just like regular dairy whipped cream. I like to use it in a bowl of fruit, on top of a fruit crisp, or stirred into Banana Soft Serve. The options are really endless! One important tip: you’ll want to chill the can of coconut milk for at least 24 hours before you begin to ensure the white coconut cream solidifies (be sure to read all my tips below on how to buy the right coconut milk for this recipe).
Ingredients
- 1 (14-ounce/398 mL) can full-fat coconut milk, chilled for 24 hours*
- 1 to 2 tablespoons (15 to 30 mL) sweetener (maple syrup, powdered sugar, cane sugar, etc), to taste
- 1 vanilla bean, scraped or 1/2 teaspoon (2 mL) pure vanilla extract (optional)
Directions
- Chill the can of coconut milk in the fridge for at least 24 hours. I like to keep a few cans in the fridge at all times so I don’t have to wait.
- About 1 hour before making the coconut whip, chill a mixing bowl in the freezer.
- After chilling the can, open the can and scoop the solid white coconut cream into the bowl. Discard the coconut water or save it for another use (such as coconut water ice cubes).
- Using an electric hand mixer or a stand mixer with the whisk attachment, beat the cream until fluffy and smooth. Add in sweetener to taste and vanilla.
- Return whipped cream to fridge until ready to use. It will firm when chilled and soften at room temperature. This will keep in the fridge in a sealed container for up to 1 week or you can freeze it in an airtight freezer-safe bag for up to 1 month. After chilling in the fridge, allow it to sit at room temperature until it softens slightly and then you can re-whip it as needed.
Tip:
- * Some brands of canned coconut milk will be better than others for making whipped cream, and even some cans within the same brand can vary quite a bit. For whatever reason, the cream and water in some brands or cans do not separate. A few of the most consistent brands for making coconut whipped cream are: Thai Kitchen full-fat coconut milk, Trader Joe’s Coconut Cream (just the cream—no water in the can!), and Native Forest. I always keep at least a few cans of full-fat coconut milk in my fridge at all times just in case I get a “dud”—then I know I have more on hand. If you happen to get a dud don’t be discouraged. Try out one of the brands above, and be sure to chill it for at least 24 hours. Odds are you will find your perfect brand after some trial and error!!
Nutrition Information
(click to expand)
There may be a strong urge to shove your face in the bowl.
8. Add in a touch of sweetener and vanilla extract and whip it again.
You can use regular cane sugar, confectioner’s sugar, or even a touch of maple syrup. I find 2-3 teaspoons usually does the trick for my taste buds. I also like to add about 1/4-1/2 tsp pure vanilla extract or a vanilla bean. The vanilla really takes it over the edge – I don’t suggest skipping it!
The first time I made this I could not get over how amaaaaazing it tastes. Eric even said he wouldn’t be able to tell that it wasn’t made from dairy. Two big thumbs up from us!
How to use:
You can use this whipped cream just like regular dairy whipped cream. I like to use it in desserts & frostings, it’s amazing over a simple bowl of fruit or pancakes, and sometimes I add a dollop on my vegan overnight oats for an extra creamy bowl. You can even spoon a bit on top of a pie or fruit crisp or stir some into a bowl of banana soft serve. The options are really endless! Have fun making different kinds of flavours and fooling your friends and family.
If making a whipped frosting, I suggest storing the decorated cake/cupcakes in the fridge until ready to serve.
Storing:
Have leftovers? You can easily store it in the fridge for at least 1.5 weeks (probably longer) in a sealed container. It will firm up a bit more in the fridge. Simply scoop it into a bowl and re-whip it when you need it.
I hope you enjoy this as much as I do! For those of you who’ve been making it for a while now, what’s your favourite way to prepare/enjoy it?


This is a really helpful tutorial. I bought coconut milk a while back to make cream from but never got around to doing it because I was scared it wouldn’t work! (Great stance, I know ;) ) I’ll move it to the fridge and get myself organised.
What an awesome alternative to whipped cream. I really have to try this sometime.
For some reason I find it more difficult to open the bottom of a can…my can opener is rather ancient…storing the can upside down means you can turn it rightside up to open it :)
Have you ever tried using coconut cream? I’ve bought a can and haven’t used it yet and was wondering if it would work.
(I think it’s different than cream of coconut that someone mentioned above)
I tried coconut cream from Trader Joe’s this weekend and it was grainy. I haven’t tried it with the coconut milk to compare, but no one else has mentioned it being grainy.
This looks sooo AMAZING I had no idea we could make whipped cream out of coconut milk! Must try it next time I need whipped cream! Thank you Angela! :)
I like it with either maple syrup or melted honey.I tried melted chocolate once, but the chocolate went hard – kind of nice, but not the effect I was after. I think chocolate mixed with maple syrup might do it. So . very . decadent.
Hey Angela! Do you think buying and using coconut cream instead of coconut milk would work instead, even better, since it’s kind of closer to what your end product is?
I havent seen coconut cream before, but Im sure it could work. Where do you buy it?
OH. You have just answered my dairy-free cream prayers. I’m making a batch of this at the weekend!
I love my whip cream like this! Yummy!!!
I want to jump right in that bowl, it looks so beautifully delicious. Thank you for the fantastic idea! Drooling…drooling…
Lynne xx
What a great photo tutorial!!
I am one of those people that fears buying the full-fat coconut milk. It’s not that I fear fat- I just .. I don’t know- it’s SO fatty. But if you say it’s worth it, I’m going to have to trust you…
This looks so amazing!
Along the same lines of the all-powerful properties of coconuts (don’t know if you know this..), coconut oil is the key ingredient in making chocolate magic shell topping for frozen things.. between that and this whipped cream, it may be a sundae kind of a weekend! :-)
Thanks so much for the step-by-step guide! Well-done too! :)
I so have to make this soon! Yum Yum Yum! :)
This is the best tutorial on coconut whipped cream I’ve ever seen. I may need to send people over to your blog whenever I’m making a recipe that used whipped cream.
uhm. LOVE IT. that sounds delicious — can’t wait to try it.
Great idea! New to me.
Angela!!! I’ve been reading your site forever but this is my first comment because you will never believe what the Trader Joe’s near me (St. Louis) just started carrying: cans of coconut cream! Like just the solid good stuff! Hurrah! Hopefully coming to a Trader Joe’s near you! Be on the lookout.
Also, I just started making lovely parfaits with my own dairy-free whipped cream concoction I thought I would share: soaked cashews, just enough water to cover, vanilla, a date or other sweetener, and then the best part is a drizzle of coconut oil as it’s blending to make it creamy and firm! Then after it is chilled it is a lovely texture. And super light tasting for being made of nuts. Gotta love that coconut oil! It’s a must-try, especially with juicy black plums and homemade glonola on top!!! But your coconut whipped cream is what I’m trying next, with the can of Trader Joe’s coconut cream I scored last night!
Also, when I worked at Starbucks (and wasn’t dairy-free), I learned a trick from some of the old-timers: adding a little bit of almond extract (in our case, syrup) to the vanilla in the whipped cream and it makes French vanilla! It’s divine. We broke SBUX law a few times and served it to our favorite customers with our modified recipe. They loved it too! We also had fun making chocolate whipped cream by adding the chocolate sauce, chocolate mint, and my favorite, chocolate raspberry. I ate it out of a bowl like it was mousse.
I might try a few of these again now that I’ve rediscovered vegan whipped cream! Thanks for the coconut love and very helpful tips!
Hey Ama, Thanks for your comment! That’s funny you mentioned almond extract – I JUST tried a version with vanilla and almond extract last night. It was killer! Thanks for sharing your tips. We don’t have TJ’s here in Canada, but hopefully they will trickle our way soon.
This is so clever! Can’t wait to try this.
Brilliant! I will definitely have to try this out soon — looks delicious.
Huh, good to know! So simple..Thanks.