
We often get asked “how do I start a blog”, or “what web host should I sign up with”? We’ve decided to create a simple 2 part tutorial to help you get up and running with your own blog.
If you’ve already signed up with our recommended web hosting provider (Bluehost), you can skip ahead to: How to Start a Blog – Part 2
1. Choose Your Web Host
There are so many hosts out there and how do you tell which host is the best? They all look so similar, but in fact some are just better than others – and this is mostly comes down to customer service and uptime. We highly recommend Bluehost. We started Oh She Glows on Bluehost and they have one of the cheapest hosting plans around (Starting at only $3.95/month including a free domain name for 1 year). Not to mention they also have a very simple process for getting WordPress up and running.
2. Choose Your Domain Name
This is the most daunting tasks for creating your own website. The reason being is 90% of the names you like are probably already taken. There are many options for your domain suffix, it may be worthwhile finding a domain name you like with an alternative suffix to .com. From what I can tell this doesn’t have any effect on SEO, but the downside is people are just used to typing “.com” after a web address, so it could cause some confusion.
To save you some time I’ve created a little widget to help you find your domain name. Enter the domain name you would like to search in the text field below and click “Check Domain Availability”.
Once you find a name you like, BUY IT! Even if you are on the fence with whether you want to start a website or not, speaking from experience – what is available today may not be tomorrow.
3. Purchase Your Domain & Hosting
a) Click here to go to Bluehost’s website, once loaded click on the “Get Started Now” button as shown below.

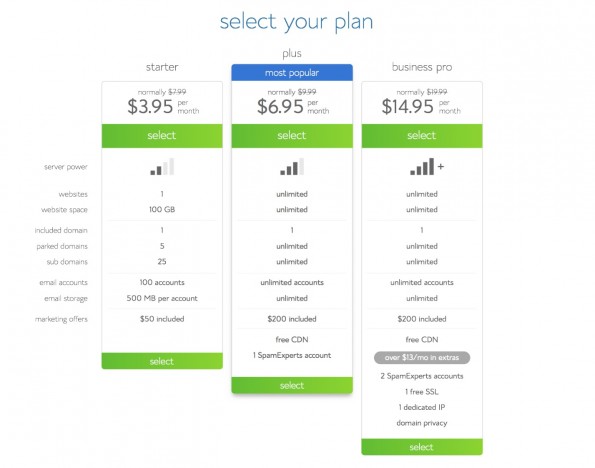
b) Next you will be asked to select your plan, choose what best suits your own needs. The additional offers in the plus plan (specifically global CDN) is well worth it. Global CDN offers to help serve parts of your webpage from multiple servers all over the country (which can improve how fast your webpage loads).
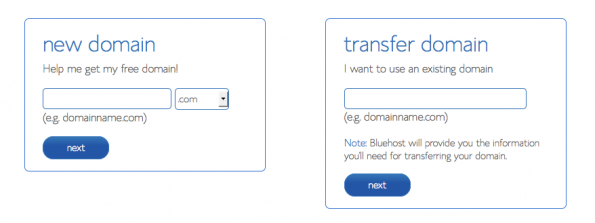
c) Next you will be asked if you are creating a new domain or if you already have one. For this tutorial I’m assuming you will be creating a new domain. Type in the domain that you want to register (that you picked in step 2), choose the domain suffix and click next.
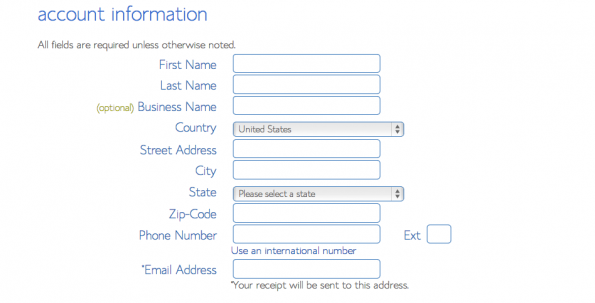
d) If the domain you choose is available it should load a new page and say something like “Congratulations! – The domain you have requested, <yourdomain.com>, is available”. Now proceed to enter your account information.
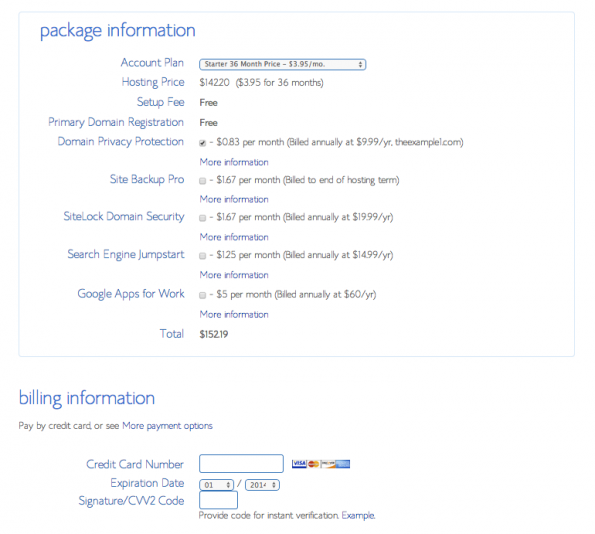
e) Once you’ve entered your account information, scroll past it and you will have to select your package information. I recommend selecting the option “Domain Privacy Protection” so that people can’t look up your address and find out where you live. Another option I would highly recommend is “Site Backup Pro”. Hopefully you will never need to use it, but should something go wrong you would willingly pay 100 times the amount the Site Backup Pro would cost. Once you’ve made your selections enter your billing information, and click the checkbox beside “I confirm I have read and agree to the terms and conditions” and click submit.
f) After you click submit it will ask for additional add-ons. Unless you want additional domain names, just click the “complete” button to proceed.

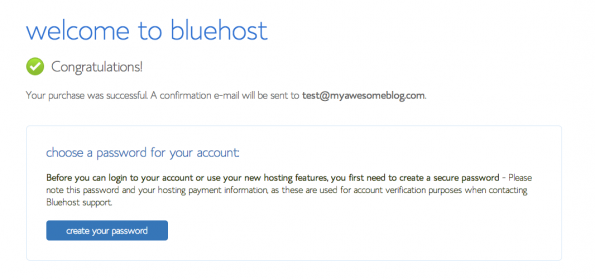
g) The next page you should see a welcome message like the one below. Click on the “create your password” button to create a new login so you can manage your website.
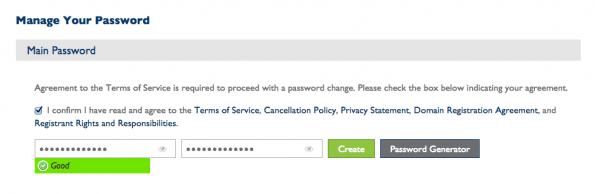
h) You will be prompted to create the new password. Make sure this password is complex as you don’t want others to be able to easily guess it. Check the box beside “I confirm I have read and agree to the Terms of Service…” and enter your password in both text fields. Now click “Create” to proceed.
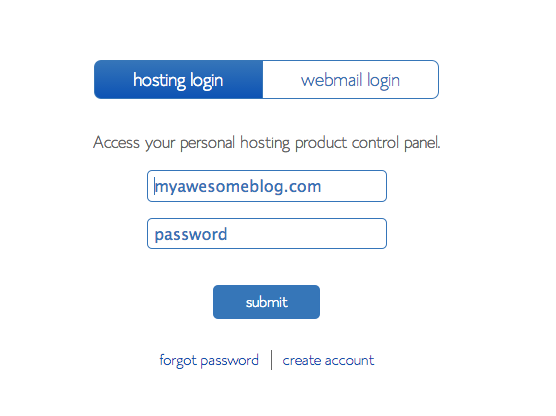
i) Once you’ve finished creating your password you will now need to login so we can start working on your website, you may have to go back to the main Bluehost page and click the login button on the top right of the website. Enter your username and password and click “submit”.
4) Congrats!
You now have purchased your domain name and web hosting, but we aren’t finished yet. Now it’s time to install WordPress, proceed to “How to Start a Blog – Part 2” for further instructions.