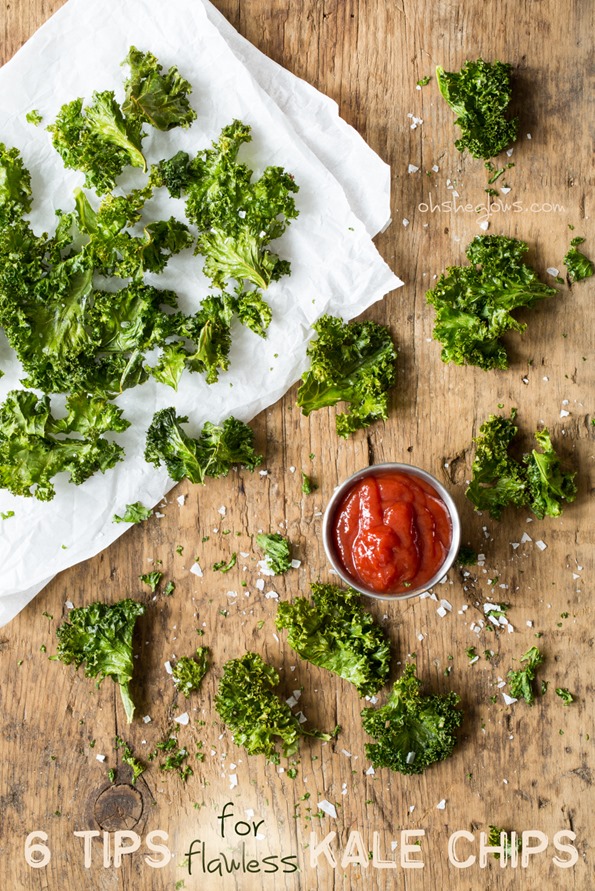
I’ve suffered through one too many batches of burned or soggy kale chips over the years. It took me a while to master my baked kale chip recipe, but I’ve learned some valuable lessons along the way and I’d like to pass my tips along to you! From the good ‘ol Culinary School of Hard Knocks (aka: my kitchen) to you. Gotta love it.
The first time I made kale chips I remember thinking, “Should they taste burnt like this??” The easy answer is no. I’ve come to find a nice balance between crispiness and chewiness without any burnt edges. Yes, this is very serious business, this kale chip business. When baked properly, they really do make the perfect base for a satisfying chip alternative.
I know some people are eager to claim that kale is “over” due to its popularity in recent years, but seeing as it’s still rated number #1 (along with Mustard/Turnip/Collard Greens) on the Aggregate Nutrient Density Index (ANDI), I don’t think it’s going anywhere anytime soon. At least not in my diet. Kale for life!
With these few simple techniques you’ll be well on your way to kale chip bliss. Or maybe you already are, in which case, feel free to skip ahead to my All-Dressed Baked Kale Chip recipe below and get crunching!
Ok, here are my top 6 tips for baking the perfect kale chips. No dehydrator required.
1. Remove the stems and tear leaves into large pieces
I don’t know about you, but I’m not a fan of chewing through woody baked kale stems. I remove the stems very quickly by grabbing the base of the stem with one hand and pushing outwards along the stem to slide off the leaves. Works like a charm!
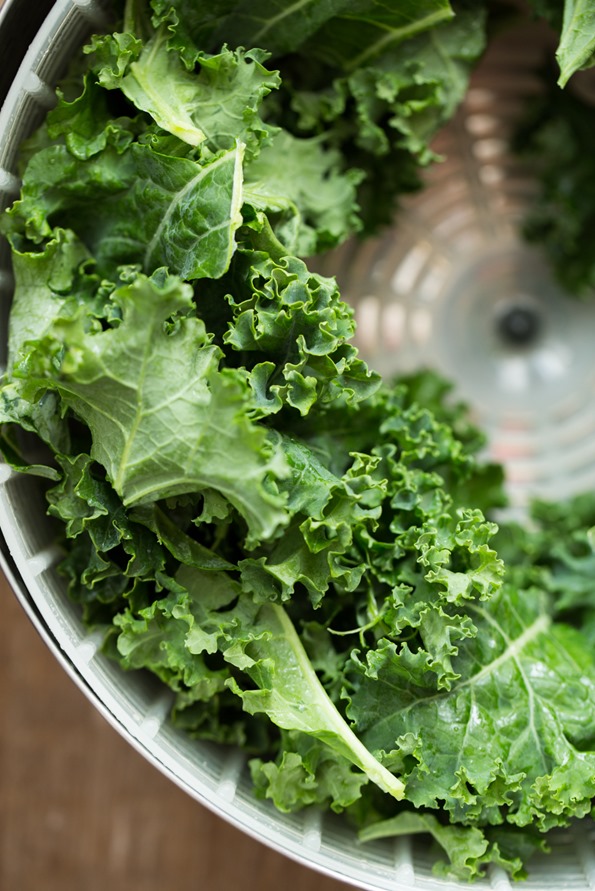
2. Wash and thoroughly dry the leaves before beginning
If the leaves aren’t properly dried, the water can “steam” the kale chips while baking and lead to the dreaded soggy kale chip! Be sure they are nice and dry before you massage in the oil. A salad spinner works great; just be sure not to overload it so the leaves can properly dry.
3. Don’t skip the oil, but don’t drench it in oil either
A little bit of extra virgin olive oil (or coconut oil, if you prefer) goes a long way. I like to use ½ tablespoon of oil per baking sheet of kale chips. “Massage” the oil into the leaves to ensure all the nooks and crannies are coated. Oil also helps the spices stick to the leaves.
4. Spread kale into a single layer on the baking sheet
I used to dump all the kale into a very thick layer on the baking sheet and hope for the best, but doing this tends to lead to soggy, unevenly baked kale chips. I’ve learned to be a bit more patient and spread them out into a thinner layer on each baking sheet. Be sure to rotate the baking sheet half-way through baking. There’s no real need to flip the chips unless you have the patience for it.
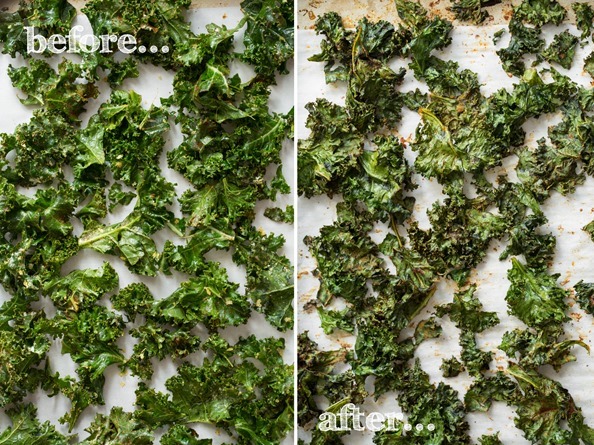
5. It’s all about the low-heat for even baking
As I wrote in my cookbook, I tested all kinds of kale chip recipes at different temperatures from very low to high heats. Surprise, surprise the batches that worked the best were the ones I baked at a very low temperature of 300F. Sure, it takes a bit longer to bake, but I can assure you it’s worth it because you don’t get any burnt pieces. Remember, the goal is to crisp the kale, not scorch it into smithereens! In my oven, I bake at 300F for 10 minutes, then I rotate the pan, and bake for another 15 minutes. So 25 minutes total for kale chip perfection in my oven. This will vary based on your oven, but it’s a good starting off point!
6. Cool for just a few minutes on the baking sheet
I’ve found that waiting just 3 minutes allows the kale chips to crisp up even more once they are out of the oven. Just like baked cookies or roasted chickpeas, kale chips really firm up even more when cooled. Those 3 minutes will feel like hours though. I won’t lie.
Bonus tips: Avoid adding liquids (such as vinegars or hot sauces) pre-baking as liquids can result in soggy chips. It’s best to add a light spritz of liquid seasoning after they’ve been baked, if at all. Also, if your oven has one, feel free to try out the dehydrator or convection setting.
Now, read on for my All-Dressed Kale Chip recipe! I promise this batch will not last long…minutes while standing in front of the oven if you are like me.
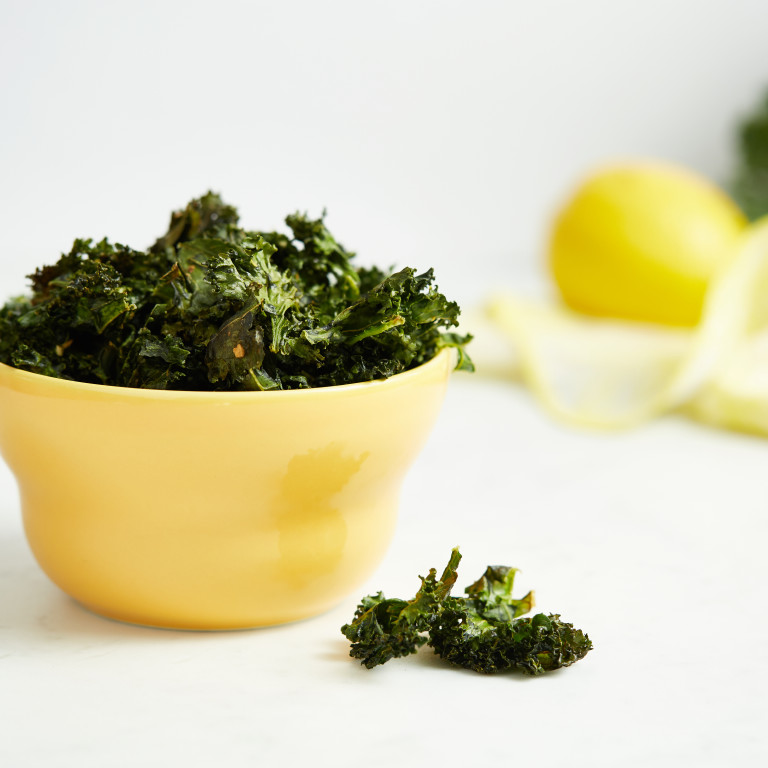
All-Dressed Kale Chips
Yield
1-2 servings
Prep time
Cook time
Total time
Crispy and chewy kale chips baked in the oven and seasoned to perfection. Enjoy these as a healthy alternative to potato chips.
Ingredients
per baking sheet:
- approx. 1/2 bunch kale leaves
- 1/2 tablespoon extra virgin olive oil or melted coconut oil
- 1.5 tablespoons nutritional yeast
- 1 teaspoon garlic powder
- 3/4 teaspoon chili powder
- 1/2 teaspoon onion powder
- 1/2 teaspoon smoked paprika
- 1/4 teaspoon fine grain sea salt or pink Himalayan sea salt
- 1/8 teaspoon cayenne pepper (optional)
Directions
- Preheat oven to 300F. Line a large rimmed baking sheet with parchment paper.
- Remove leaves from the stems of the kale and roughly tear it up into large pieces. Compost the stems (or freeze for smoothies). Wash and spin the leaves until thoroughly dry.
- Add kale leaves into a large bowl. Massage in the oil until all the nooks and crannies are coated in oil. Now sprinkle on the spices/seasonings and toss to combine.
- Spread out the kale onto the prepared baking sheet into a single layer, being sure not to overcrowd the kale.
- Bake for 10 minutes, rotate the pan, and bake for another 12-15 minutes more until the kale begins to firm up. The kale will look shrunken, but this is normal. I bake for 25 mins. total in my oven.
- Cool the kale on the sheet for 3 minutes before digging in! This really makes all the difference! Enjoy immediately as they lose their crispiness with time.
- Repeat this process for the other half of the bunch.
Tip:
Feel free to make these in a dehydrator if you have one. You can also experiment with the convection or dehydrator setting on your oven (if applicable).
Nutrition Information
(click to expand)I can’t end this post today without thanking you for your lovely comments in my recent post. I’m reading through all of them and greatly appreciate the support, advice, and love. Sketchie’s staple removal went fine (it took a few minutes and didn’t seem to even bother him) and he is healing well from surgery.
My kids’ school has garden plots & 4 this novice gardener & the kids, been an adventure! 1st, organic materials only: 2nd, must thoroughly wash produce b4 eating NOTE: I am NOT a dr or any type of food prep specialist but sci. teacher Explained about unseen bacteria & pathogens found on onwashed produce. Nasty).
3rd: Also Flash Cooking (15-30 sec) @temp over 160F works 2 kill nasty stuff
Now my question: is it possible to use a toaster oven to make chips? Toaster oven is an allowed appliance ok’ed in classroom w/ adult supervision. Thanx and hope my comments & question not too rambling
So I didn’t measure my coconut oil out because I had precut kale in a bag and didn’t know how much to use and so I just poured it in with the kale. BAD IDEA. It didn’t make it soggy, however it made them cook really fast. After 10min they were almost burned. For the second batch, I guess there was more oil because it was on the bottom and after 10min they were barely cooked. The more you know. ??♀️
I made the chips last season from a slightly different recipe and they needed improvement. So I tried this one, substituting grated parmesan for yeast and potassium chloride (No Salt) for sodium chloride. I picked 25 of my big kale leaves and they filled three oven pans. Very dry around here, with just a bit of morning dew, so after tearing off the petioles I set the leaves in the hot sun on 22×16″ pieces of 1/2″ hardware cloth I use to make oven jerky. In about a half hour they were ready to oil and spice. No dryers, no bags, so large time and energy savings there.
I had the last pansfull oiled and spiced, so decided to experiment. I put the leaves on paper and covered them with one of my pieces of hardware cloth to keep them from blowing away. It was about 90F on my deck. I took them in after about 4-5 hrs and to my surprise they were far better than any baked chip I have ever tasted. They retained much of their nice green color and were slightly thicker and far more pleasant to eat, being crunchier, less oily and with not a hint of burned or dry edges or fine oily particles. I’m going to make my entire kale crop into these in a day or two. No more indoor oven work when its already blistering hot outdoors.
I love these kale chips! The spice mixture is amazing, it goes great on popcorn! Thank you for sharing this recipe, I have been using your recipe for at least two years now, it’s my go to, especially for the spice mix.
Hal’s Kale Chips
I modified an internet technique that called for yeast and sodium chloride and a 230F oven. Chips came out dark , with a few burnt edges, and a bit too oily for my taste. I substituted grated parmesan for yeast and potassium chloride (No Salt) for sodium chloride and used oil in spray cans. This technique saves time and energy as there are no requirements for dryers, bags, and a 230F oven, if the oven is used at all, for a large time and energy savings
Ingredients for four screens or oven racks of kale pieces. This takes about 32 large (12-16″) leaves:
Spray can of olive or coconut oil.
4 tbsp grated Parmesan cheese
3 tsp garlic powder
2 tsp onion powder
2 tsp chile powder
2 tsp smoked paprika
1/2 tsp cayenne powder
2 tsp No-Salt or fine regular salt or sea salt
Equipment
Four pieces of 1/2″ mesh hardware cloth 22×16″. These are my jerky screens.
Paper (kraft, newsprint, or old newspapers)
Large bowl for oiling and spicing; small bowl to mix spices.
Shaker with holes no smaller than 3/16″
Technique
Pick leaves mid-day when it is dry and tear off large pieces. There are a couple pair of bite-size lower lobes on my leaves so I pull those off first and then tear the big upper section off the petiole and pull it in half. Fill all four screens and set out in hot sun in a place where there is little or no wind. Let dry for an hour or so, then bring inside.
To oil, first spray the leaves when still on the screen, then let them fall into the big bowl, oil side down, and spray again. Then massage and tumble the leaves till coated all over. Repeat, but this time the leaves can be turned upside down on the first screen and sprayed on the other side before putting in the bowl and massaging. Drying and oiling reduces the size of the pieces and they now will fill only three screens.
To spice, fill the shaker with the mix and alternately shake, massage, and tumble the pieces till the shaker is empty.
Put the prepared leaves on a piece of paper, place in the hot sun, and cover with a screen. About 4-5 hours is usually long enough to finish the chips. But if it gets overcast or windy, or you wish to hasten the process a bit, merely place them in a 180F oven as a unit till the chips are dry and crunchy. Make the unit by setting the three drying assemblies on top of the empty screen.
I freeze my kale chips loose in plastic containers for winter enjoyment.
I
I was getting frustrated with burnt, soggy kale chips and then I found your website. These are the BEST kale chips I’ve ever made! Thank you!
Finally Kale chips that taste great and are easy to make. One question – I made a lot so how can I store them so they stay crunchy? Thanks!
Hi Angela~
You’re kale chip recipe rocks! Been a veggie head for over 40 years. Presently, vegan and 75-80% raw. What a treat! You and your cookbook are truly loved and appreciated ?
Aw, thanks for the love, Chaya! It means a lot :)
Should I put the oven on “bake” or “roast”?
I had to bring my oven down to 275F and added a spice called “Chulería en Pote.” It has turmeric, salt, garlic, brown sugar, coffee, smoked paprika.
Hi Conchita, That spice sounds fantastic! Hope you enjoyed the end result. As to your previous question about using “bake” versus “roast” on your oven, it sounds like you figured things out alright without me. :) As every oven is a bit different, I’m not positive what setting would be best, but I think I would’ve said you’re probably safe with using the bake setting so long as you just keep an eye on them. Out of curiousity, which did you go with?
I bought a huge bag of organic kale pre-cut & washed & did not have to worry about the drying time :D I made it to your specifications & it turned out wonderfully! I made 2 batches and ate it all. :P Thank you.
I intend to try this tonight. Thank you.
Happy cooking, Peggy! Hope you enjoy :)
My first attempt at Kale Chips was a success due to finding your tips! I seasoned mine with nutritional yeast and Spike. Thank you so much! I just started following you on FB too :)
So happy to hear it, DJ! :)
Just tried your Kale Chips, wow, they are exactly what I was looking for. Thanks for all the tips which by the way, challenges my patience! But well worth the time spent in preparing, cooking and the final cool down to make them crispy!
So happy you enjoyed the kale chips!! Thanks for your review. :)
Yuuuuuuuuummmm!!!! I hated Kale!!! Started a keto diet and craved forbidden snacks and definitely wasnt keen on burnt veg. Followed your instructions, came out perfect and so satisfying, thank you :)
So happy the kale chips recipe was a hit!
How long can these be stored? Would these last for a month, unrefrigerated?
Hey Kim, We tend to gobble ours up the same day usually (kale chip fanatics over here, haha), so I’m really not sure. My guess is that they wouldn’t last much longer than a few days on the counter. I think they also tend to lose their crunch over time.
This recipe was perfection! My hubby and toddlers LOVED them!
That’s great news Kristine!
Kale chips is very delicious. Our family is very love it. Thanks for sharing this recipes and tips to making kale chips.
Amazing!
Got batch #2 in the oven right now :) trying out paprika, cayenne, turmeric (as i put that in/on everything) olive oil, coconut oil, black pepper!
Glad to hear that! :)
Just made this and it is super. Thanks.
I bake my kale in a 200 degree oven with no oil. I have to turn them a couple of times but they come out crisp and I can crumble them in my smoothies! The same with dandelion greens!
This recipe came out perfectly! & it’s my 1st time ever making kale chips. Thanks! ??
That’s great news Kimberlee, thanks for letting me know! Did they disappear as fast as mine do? ;)
Made these for my husband who wanted kale chips – a double recipe was gone while I blinked! Clearly he didn’t like them at all. ;). I’ve made 25X the seasoning mix & stored it away for future use. Thanks for a new fave!
Whohoo! That’s awesome. So glad they were a hit Cindy :)
Bought the organic chopped kale at Costco, triple washed. Followed your directions, omitting the yeast because didn’t have any. The technique is spot on and the seasonings were fabulous! Thank you so much for sharing your recipe.
That’s great Elaine! Thanks for your review :)
I followed directions exactly. They came out tasting burnt. Maybe if I ever try again it will be 10 minutes twice & not the 10 & 15. Or maybe 275 instead of 300 degrees. The burnt taste makes them taste nasty & I normally love kale.
Made these last night and they were delicious! My first attempt at kale chips and they came out perfect – I ate a whole bowl!
That’s awesome, thank you for letting me know!
I didn’t really have time to dry mine thoroughly, so I added the grill plate from my toaster oven to the top of the pan and placed the kale on top of that because the grill has little legs that lift it about 1 inch and this allowed any moisture to drip from the leaves during the baking process and they turned out perfectly crunchy. :)
The best recipe!! They were perfect. Thank you for taking the time to get it just right. I love this blog.
Hey Vanessa, Aww thank you so much for the kind words! So glad these kale chips were such a hit. :)
I’m excited that my 9 year old asked for more kale chip today. We ate a whole batch yesterday. Thanks for the great recipe.
Winning!! hehe…love this. So glad you both enjoyed them!
Love it! Thanks! Too bad I can’t post pic here…
I intend to try this tonight. yummmm “Kale Chips”. Thank you for taking the time to get it just right. love……
You know what works better? Spray them with olive oil, sprinkle on flavour of choice (I just use salt and pepper, maybe some garlic powder) and put them in an air fryer for 10 minutes. Perfect every time with minimal effort.
Thanks for the tip Naomi!
To be fair, many more people own / have access to ovens than they do air fryers.
Hi, can I skip nutritional yeast? Thanks!
Another person asking….Can I skip the nutritional yeast? Please answer…what the purpose of the Nutritional yeast is? TYSM
hey Mari, Yes for sure you can skip it. The nutritional yeast adds a cheesy/savoury flavour to foods.
Love it! Thanks! Too bad I can’t post the pic here…
Awesome results!! First time ever I could bake absolutely perfect kale chips! My family loved it very much. Thanks a lot!
Hey Nidhi, I’m so glad you enjoyed the kale chips! They’re perfect to have on-hand for a healthy snack. Thank you!
Thanks for this! I used the Lazy Genius’ google search advice: when looking for a new recipe online add “best” to your search. I found you! I actually had nutritional yeast because I’m a Whole30er. ? My oven must be way off because I took the first batch out at 16 minutes and they were dark/partly burned. No biggie! My husband, 6 yo and I still liked them! And now we tweak or… buy a new oven. ?
I has the same result. Now only do the first 10 mins.
Thank you for the advice. I haven’t made kale chips in a long time, because I’d tried it once and they didn’t turn out well. With your tips they turned out delicious! I didn’t have nutritional yeast at home, but they are great anyways.
I’m so happy to hear that Sanni! Thanks for your review :)
For the first time ever, I made the perfect kale chips. Thank you, thank you, thank you!
So happy to hear that Lola!
I made these on the convection setting. It took about half the time and they are perfectly crisp. Wonderful idea, thank you so much
Hey Tanya, I’m so glad you loved the kale chips! So many great ways to mix up the spices for them too.
How do i store these after cooling? Thankyou.
Hey Wendy, to be honest, I don’t think they retain their crispiness no matter how I’ve stored them (glass or otherwise). You might have success reheating your kale chips in the oven the next day (I do this with roasted chickpeas all the time and it works great!). I hope that helps!
Kale is on sale this week, so I decided to give Kale Chips another try. Having lost my previous recipe (which was no great loss considering it produced burnt, but otherwise flavorless, chips) I googled Kale Chips and chose the first page recipe with the highest rating. I was immediately excited when I saw the recipe called for Nutritional Yeast because I had just purchased my first jar and had no clue what to do with it. Prep time is a little off as it took some time to dry the kale thoroughly without a salad spinner. But the results are Oh. So. Worth. It. I am enjoying my bowl of crispy, flavorful, perfectly done but not overdone, kale chips as I write this review.
Whohoo! That’s my kind of sale ;) I’m so happy you loved the kale chips, Jill!
I’m going to try your recipe tonight, minus the hot spices. It sounds great, thanks for the tips. First time making it, I would have made soooooo many mistakes.
Thanks for sharing this! I have some leftover kale that needs to be used up and this will be perfect to go with the not-so-healthy leftover pizza.
Sounds like a great pairing to me! ;) Hope you enjoy them Judy
Every set of directions for kale chips has failed for me, and this on is no exception. I only had them in the oven for 18 minutes and they came out so crispy that they disintegrated when trying to put one into my mouth. I’ll try again at a lower temperature, maybe 250, or for only 14 to 15 minutes and see what happens.
Hey Rob, Kale chips are actually supposed to do just that (get super crispy and disintegrate in your mouth) haha…I know it’s a weird thing, and can take some getting used to :)
I love how easy kale chips are to make!
I just tried your tips. I used the convection oven setting at 325F, which self adjusts to 300F. Came out great! They can grab a lot of oil, so I had added too much oil into the bowl of kale pieces, and once massaging in I noticed this. I then added a few more, and then a few more, uncoated leaves to get the coating thinner as I continued to massage the leaves and oil together. I coated them with only cracked pepper and sea salt, which what I use in all my cooking, and they came out great! Such a light way to get your healthy kale. Tried a little celery salt on a few, red pepper on a few, both worked and were good – added along with the salt and cracked pepper. I’ll try some other seasonings next time.
Hey Jane, So happy they worked out so well! Thanks for sharing how you made them :)
They are delicious! I ended up baking them as instructed before turning, because I noticed that my chips were becoming crispy fast. So, it only took another 7 minutes baking time after turning.
It could be due to my hot oven or maybe due to my fresh picked kale out of my garden.
Btw..this is a great spice blend, too.
I’m enjoying….
My kale chips have a bitter after taste why?