

A couple weeks ago, a reader named Cara emailed me with a recipe request for a vegan spring stuffing. Her complaint with traditional stuffing was that it felt too much like autumn instead of spring; it tends to be heavy, instead of light and fresh.
Cara is onto something here, don’t you think?
I love when I get recipe requests because I feel like I have a mission instead of just aimlessly trying to think up recipe ideas all the time. It’s also fun to be presented with a “problem” and then hopefully making someone happy with the end result.

I got to work rounding up some of my favourite green spring-time vegetables like asparagus, green onions, and peas. I also picked up some fresh parsley and thyme for flavour. This is turning out to be one green spring stuffing!

I also recommend using a hearty seed & raisin/cranberry bread (from your grocer’s bakery is fine!). The raisins and cranberries in the bread will add just a hint of sweetness, but it won’t overwhelm the stuffing. The seeds will also add texture and the thick crust will prevent the entire thing from turning to mush. I have no idea how this stuffing would turn out with another type of bread.
When you get home, slice the bread and roughly chop it up (or tear it) into 1 inch chunks. I like to leave my pieces a bit large to add texture to the finished product. Place the bread onto a baking sheet and leave out for 10-12 hours to dry out (I put mine in the oven (turned off) because Sketchie loves to steal bread!)

The next day we can officially begin. Sauté the olive oil, minced garlic, carrots, and asparagus until they are just tender. Be sure not to overcook it as you want the veggies to retain some crispness in the stuffing.

Now add in the peas and edamame and cook until heated through. Next, is the part that you do not want to skip – season the vegetables very well! I used a generous amount of Herbamare and ground black pepper. The Herbamare was fantastic in this, so if you can pick some up, I highly recommend it.

Remove from heat and stir in the bread.

followed by the fresh and dried herbs.

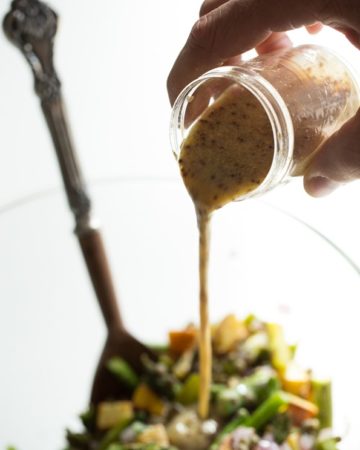
Finally, gently stir in 1 cup of vegetable broth. Many stuffing recipes tend to call for 2 cups or more of broth, but I didn’t want this one too heavy and saturated so I just used one cup.

Transfer it to a greased casserole dish, cover, and bake for 27-30 minutes at 400F.

Remove the lid and allow it to cool for about 5-10 minutes if desired. It stays hot for a loooong time. I went upstairs, did some computer work, and came back 20 minutes later to still find warm stuffing! :)

What you’ll have is an incredibly light stuffing bursting with spring vegetables. The bread pieces on top remain a bit crusty, while the bread underneath gets really soft, saturated, and doughy.

Traditional stuffing usually gets a bad reputation for being one of the unhealthiest dishes at your dinner table. Well, now it doesn’t have to be any longer.
It’s actually so healthy, it makes a killer breakfast. I actually made this at 8:30am last week and inhaled a plate for breakfast…just throwing that out there!


Featuring all new, protein-packed salads, hearty toppers, flavour boosters, and dressings you'll want to drink, my new cookbook will transform the way you think about salads. Oh, and be sure to flip to the back for a surprise dessert chapter!

Lightened Up Spring Stuffing

Yield
5 to 6 cups
Prep time
Cook time
Total time
A lightened up stuffing that you can feel good about this spring. Many stuffing recipes tend to call for 2 cups or more broth, but I didn’t want this one too heavy and saturated so I just used one cup. Also, feel free to use frozen peas and edamame like I did. Just be sure to thaw overnight in the fridge and rinse and drain prior to use. I also suggest using a crusty seed & fruit bread from your local grocery or bakery. This type of bread will hold up much better in the recipe, as well as provide a light sweet flavour from the cranberries and raisins.
Ingredients
- 1 loaf crusty seed & cranberry raisin bread, roughly chopped into 1-inch pieces (5-6 cups packed)
- 1 tbsp extra virgin olive oil
- 3 garlic cloves, minced
- 1 cup peeled & finely chopped carrots
- 1 bunch asparagus, ends broken off and finely chopped
- 1 cup peas (if using frozen, thaw and drain first)
- 1 cup edamame (if using frozen, thaw and drain first)
- 2 tbsp fresh lemon juice
- 8-9 green onions, finely chopped
- 1/2 cup fresh minced parsley
- 2 tbsp fresh thyme
- 1/2 tsp dried oregano
- Herbamare (or salt) & ground black pepper, to taste
- 1 cup veggie broth or more if desired
Directions
- Roughly chop (or tear) bread into 1 inch chunks. Place the bread onto a baking sheet and in the (turned-off) oven overnight or for about 10-12 hours. This lets the bread firm up and get a bit hard so it retains its shape in the stuffing. If using frozen peas and edamame, place in fridge overnight to thaw. Rinse and drain before use.
- The next day, preheat oven to 400F and grease a 2.3 L/2.5 qt. casserole dish. Heat a large skillet or wok with 1 tbsp oil over medium heat. Add in the garlic, carrots, and asparagus and sauté until just tender, about 8 minutes or so. Season well.
- Now, add in the (drained) peas, edamame, fresh lemon juice, and green onions and sauté until heated through, about 5 minutes. Stir in the herbs and season again with Herbamare & pepper to taste. Remove from heat.
- Gently, stir in the cup of broth, being careful not to overmix the bread. Transfer to prepared dish, cover, and bake for 28-30 minutes. Carefully remove lid and allow to cool for 5 mins or so before serving.

Here’s little behind the scenes action for you, using my homemade photography board, diffuser, and props (herbs, burlap, and napkins). I’m also still loving Helene’s book. I highly recommend Plate to Pixel if you are getting serious about food photography. I’m trying to practice a ton in hopes that I will feel comfortable shooting all of my cookbook photography.

If you are looking for a main dish to serve the stuffing with, I suggest trying the amazing Lentil Walnut Loaf.
Coming up, a mini & portable chocolate peanut butter dessert that will blow ya mind.


I love this recipe! We have a huge feast after Easter, and while it’s generally meat dominated, I have a feeling this will please everyone there — and give me something delicious to eat!
Looks absolutely delicious! I loooove stuffing… so this is perfect and will make me feel way less guilty for eating it :) Thanks Angela!
And your photography looks absolutely amazing!
Yum yum, get in my mouth!!!
I think your photos have a very distinct look and it just wouldn’t be your cookbook if you weren’t also the photographer. I can’t wait to see the result!
Thank you, you are too kind! I’m practicing a lot lately, trying to improve technique. It’s really fun though and I love it the more I practice.
I’ve only made stuffing once, and it was the easy boxed variety. I’d really like to make a more grown-up version.
Yum! That looks and sounds amazing! I can’t wait to try it! Also, thanks for suggesting a main dish to serve it with! :)
thanks for more “behind the shot scenes” love love LOVE your creativity Angela. Also, what happened to your rosemary and other herbs that were in the garage at the old place? :)
the potted rosemary went to a neighbour I think! Although I do hope to plant some of my own this spring.
you WILL plant…those pictures on your blog of you summer gardening are SO PRETTY ! and you look like you have so much fun in the garden
mmm looks delicious! stuffing is one of my favorite thanksgiving dishes. Now i can have it in the spring time too :)
Enjoy Kris :)
i just love all of the bright colors! totally makes the dish :)
This looks great! I’d imagine you could adapt it to just about any veg combo you prefer as well, making it a good way to “use up” whatever’s hanging in the fridge waiting to be forgotten about… I’m going to have to play with the bread though, as my husband can’t do whole cranberries/oats/some seeds (crohn’s) Thanks!
Yes it can certainly be adapted…great idea
Your photos look gorgeous – I have no doubt that you would do an amazing job shooting your own photography for your cookbook! I absolutely love the distressed wood board.
PS I made your lentil walnut loaf last weekend and am a big fan!!
Thank you Stephanie!
Glad to hear you enjoyed the loaf. :)
And she does it again… looks amazing, Ange!!!
Thank you :)
I made your lentil walnut loaf last week and I couldn’t get over how much it tasted like my mom’s regular meatloaf, which I haven’t had in over a year. So good! and so good on sandwiches the next day :)
haha crazy stuff! Glad to hear you enjoyed it. :)
I LOVE stuffing – and you’re right, it doesn’t need to be relegated to fall. What I love is including fruit in my stuffing – traditionally apples – so perhaps I could also make it more springlike by including a spring fruit in my spring stuffing! Also, I’m very excited for this pb and chocolate dessert :)
Fruit was on my mind too…although I was too chicken to try it out. Maybe next time! Enjoy if you make it.
Mmmmm this looks absolutely delicious! I love the addition of the edamame too – this has enough protein to be a main dish served by itself ( major bonus in my book!!).
Do you think adding mushrooms would ruin the spring vibe to the dish?
Im sure it would taste delicious…I also debated putting mushrooms in but didnt want the ingredients to get too much longer. Enjoy!
This looks super delicious!! Great recipe! And thanks to Cara for requesting it!! lol
This recipe sounds amazing and I admit I don’t think of stuffing outside of big holiday meals because it is so ‘heavy’. I’ll have to give this recipe a try!
Before you even mentioned the cookbook photography, I was thinking to myself that your food photography has really come a long way and is quite impressive. I love that you’re self-taught and that the food is real! Can’t wait for the book!
xx
Thank you Nicole, that is so nice of you to say! I appreciate it.
Oh, Angela, it look sooo good!
Can’t wait to try it!
This looks so delicious! And I love your photos- there’s so much texture and color. Thank you!
Thank you Kristy!
OH MY GOODNESS! This looks amazing! I was just thinking “hmmm what should I make for Easter that everyone will enjoy and I’ll actually eat!” You have answered my question for me! thank you!
I’m curious, why no microwave?? After I read The Kind Diet I have been trying harder not to use mine and just wondered what made you not want one.
I hope you enjoy the stuffing!
Re: microwave- I’ve heard a lot of negative things about how it depletes nutrients in food so I figured it was time to try kickin it old school for a while. I hope to steam things on the stove top as much as I can. so far im not missing it as much as I thought and Im getting used to reheating things on the stovetop now.
Yeah, I’ve heard that too :( My brother doesn’t have a microwave and I always gave him a bad time about it….Hmmmm karma? ha.
What about a toaster oven? I’ve heard you can re-heat in those on the “broil” setting? Wonder if that depletes the nutrients?
Let me know how it goes!