
Doughnuts are the new cupcake, did ya know? :)

All of you can thank my sister Kristi for this post today because she is the one who had these amazing doughnut pans delivered to my doorstep for a birthday gift! :)
I have been meaning to buy these pans for a long time so I could make this incredible recipe over at Vegan Yum Yum. I am a huge fan of Lolo ever since I came across her website a few months ago. Did I mention she was on Martha Stewart? Umm, yea I know.
Lolo is a big freakin’ deal.
And we all love her.
So when I saw these amazingly cute vegan mini doughnuts on her site, I knew I had to make them. The only snag was that I didn’t have any doughnut pans. But don’t worry, I have found a way that you don’t need the pans to still make awesome doughnuts! You also don’t have to have vegan products to enjoy this recipe either.
Baked Vegan Doughnuts

I followed Lolo’s recipe to a tee today because, well, she is a genius in the kitchen.
Dry Ingredients
1 Cup All Purpose Flour
1/2 Cup Sugar (I used raw cane sugar, but feel free to use white)
1 1/2 tsp Baking Powder
1/4 tsp Salt
1/4 tsp (scant) Nutmeg
1/4 tsp Cinnamon
Wet Ingredients
1/2 Cup Soymilk (I’m sure this would work with any milk or non-milk substitute)
1/2 tsp Apple Cider Vinegar (I believe you can substitute this for regular white vinegar)
1/2 tsp Pure Vanilla Extract
Egg Replacer for 1 Egg (If you don’t use egg replacer feel free to use 1 egg)
4 Tbs Earth Balance (regular margarine should work too)
Icing Glaze:
- 1/2 cup powdered icing
- 1 tbsp soy milk
- sprinkles
Directions:
Preheat oven to 350F. Take all the wet ingredients and put in a small pot on the stovetop on low. Whisk ingredients together to blend well. Do not let the mixture get too hot, it should just be warm to the touch. Mix the dry ingredients together in a large bowl. Add the wet to the dry and mix until just incorporated. Do not over mix. The batter will be 1) Very very sticky- but don’t worry, and 2) It tastes like a dream– try not to eat all of it. :)
Now comes the tricky part. Putting the batter into the doughnut pans. After a few trials, what I found worked best was taking a tablespoon’s worth of dough (if using the mini pans) and scooping it directly over the individual mold. Then take your fingers to press it out and make the middle pop through.
Bake for 12 minutes. You don’t want them brown, but they should slowly pop up when pressed with a finger. Cool on a wire rack and then decorate!
Makes 20 mini doughnuts.
Don’t have doughnut pans?
Now if you don’t have doughnut pans (and really who does??) you can shape them by hand. The trick is to WET your hands very well or the dough will stick to you like nobody’s business! Keep wetting your hands as soon as the dough sticks. I will show a picture of my ‘handmade’ doughnut below. It isn’t picture perfect, but they don’t need to be. What I also wish I did, is try making Timbits (or as the Americans call them, ‘doughnut holes’) by just making round balls of dough. The round balls would be really fun to roll in sprinkles too!
I tried to take pictures of the entire FUN process today!
I can’t say enough how easy and fun these were to make! They would be a big hit with kids. :)


This is my handmade doughnut :)

Out of the oven:

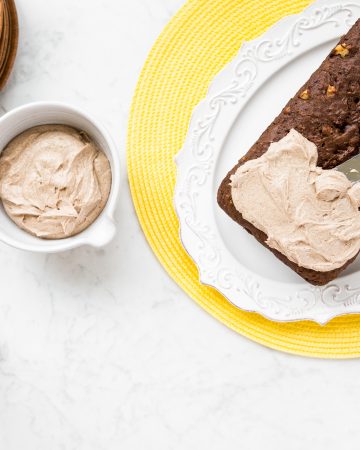
making the icing (SO easy!):

Removing from pans (use a knife around the edges of the mold- mine didn’t flip out):


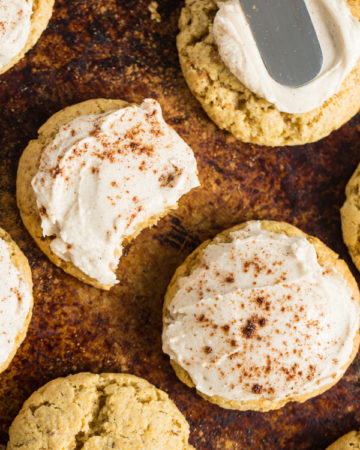
How cute are they?!

My handmade one made me giggle. I loved it the most.

Time to get dressed for school!!!


Now here is where you can get creative:
Use different kinds of sprinkles. You could even try using different coloured icings!!!


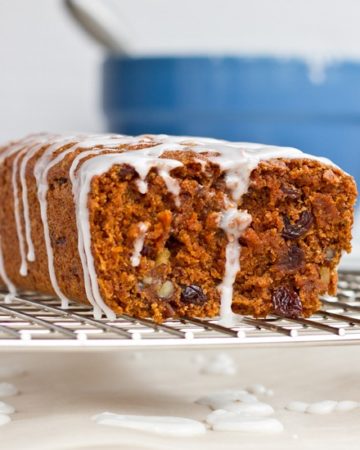
I made a “Canadian, eh?” Maple Walnut doughnut :D I dipped it in icing, then sprinkled walnuts on it, and then drizzled pure maple syrup over it. WOW. You can guess which one I ate!

Did I mention that these taste better than any doughnut I have had at the doughnut shop? I think it is because they are homemade. :)


Covered in raw turbinado sugar:

If anyone makes a non-vegan version (or the vegan version for that matter) let me know how it goes! These are honestly addicting!!
And they won’t break your calorie bank either.
One doughnut (with icing):

78 calories for a doughnut!!!??? Hot damn! :)
Add about 20 calories if you will be using sprinkles. It still comes in at under 100 calories per doughnut.
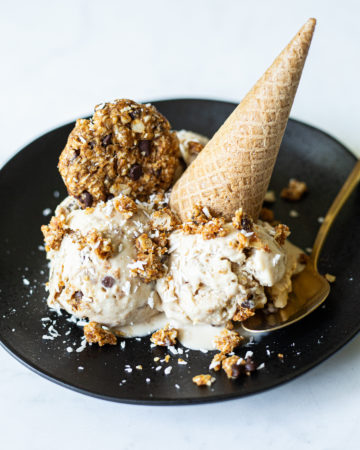
Oh and you can see my previous low fat baked banana doughnut recipe here. These are fantastic as well! I shaped all of those ones by hand and they came out fab.
And you can bet your socks I will be experimenting with this recipe. I am already planning on using some whole wheat flour and adding some mix-ins to my next batch.
Yum. Yum.

Tonight’s question: What is your favourite kind of doughnut? Mine was always maple glazed doughnuts. I LOVE maple!


Help! I’m dying to make these baked doughnuts, but I’m out of Earth Balance? What can I substitute it with?
hi angela, how long do these keep for? and have you tried freezing them?
For some reason my batter was very watery :( so I just made blobby cookies out of it
I just made these yesterday! I made 2 batches. 1 turned out and the other didn’t turn out as good. I included what I did in case anyone was interested…
1st batch (not as good)
-I used All purpose gluten free flour instead of all purpose flour
-I used coconut sugar instead of white sugar
-I used butter (not vegan) instead of earth balance or margarine
-I used almond milk instead of soy milk
They weren’t as soft and fluffy as my 2nd batch.
Here’s what I did for 2nd batch:
-I used all purpose flour
-I used brown sugar
-I still used butter
-I still used almond milk
The 2nd batch turned out amazing and I’ll definitely make these again. They take no time at all and my husband still can’t believe that I made donuts!
Made these are directed (vegan). They came out moist, plump and perfect. No alterations needed for me. I am going to try the banana version very soon. Thanks for this blog. I love your vegan cheeses too.
Thanks for the lovely comment, Peggy! I’m so happy the doughnuts were a hit. :)